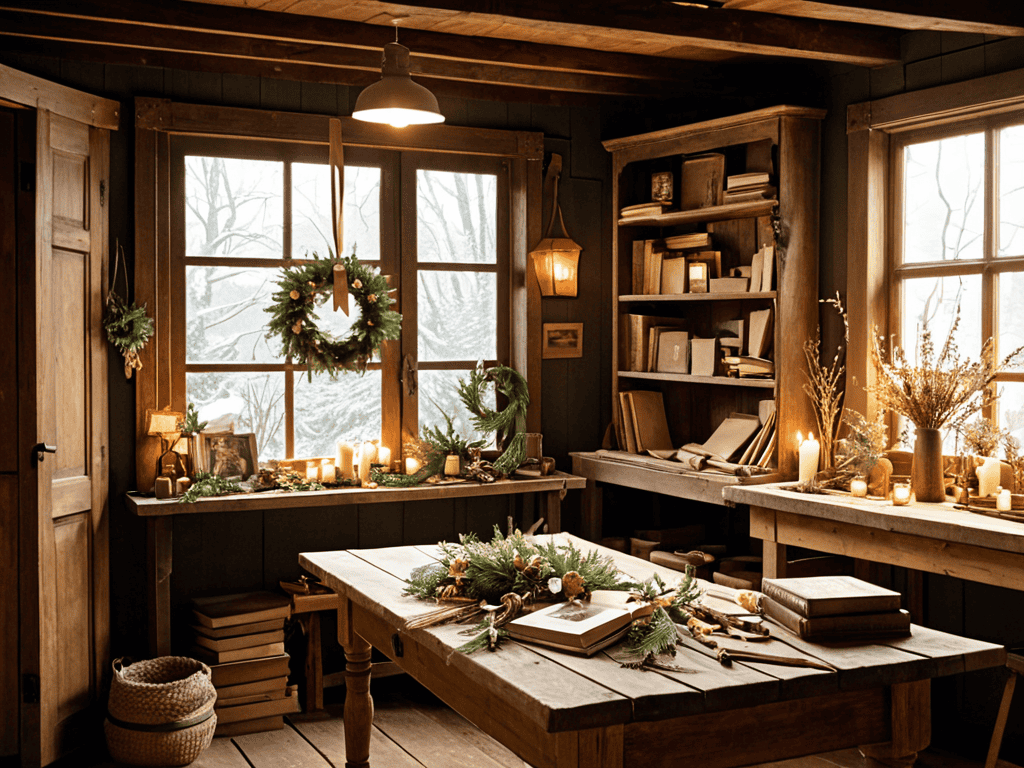
As I sit amidst the rustic charm of my workshop, surrounded by the gentle ticks of upcycled clocks and the warm whispers of vintage materials, I’m reminded of the countless times I’ve been asked about how to make a DIY wreath for your front door. It’s a question that sparks a sense of nostalgia within me, taking me back to my family’s old hardware store where I first learned the value of transforming the forgotten into something truly unique. My grandmother, an eccentric artist with a flair for the dramatic, would often say that a beautiful wreath is not just a decoration, but a story woven from the threads of yesterday.
In this article, I promise to share with you my personal approach to crafting a timeless DIY wreath for your front door, one that embraces the beauty of imperfection and celebrates the joy of creation. You’ll learn how to select the perfect materials, from forgotten twigs to reclaimed woods, and how to weave them into a narrative that reflects your own personal style. I’ll guide you through the process with honest, no-hype advice, drawn from my own experiences as a narrative tinkerer and artisan furniture designer. By the end of this journey, you’ll be equipped with the knowledge and inspiration to create a DIY wreath that not only adorns your front door but also tells a story of its own.
Table of Contents
Guide Overview: What You'll Need
Total Time: 1 hour 30 minutes
Estimated Cost: $20 – $40
Difficulty Level: Easy
Tools Required
- Wire cutters (for trimming floral stems)
- Hot glue gun (with extra glue sticks)
- Scissors (for cutting ribbon or fabric)
- Measuring tape (for measuring the wreath frame)
- Pliers (for shaping wire or floral stems)
Supplies & Materials
- Artificial flowers or greenery (choose your desired colors and textures)
- Wreath frame (available in various sizes, typically 12 inches to 24 inches in diameter)
- Floral wire (in green or brown to blend with the stems)
- Decorative items (such as ribbons, bows, or pinecones)
- Faux berries or other embellishments (optional, for added color and texture)
Step-by-Step Instructions
- 1. To begin our journey of crafting a timeless DIY wreath, I start by gathering a collection of forgotten twigs and branches from the woods behind my family’s old hardware store. The rustic charm of these natural elements will serve as the foundation of our wreath, and I find that the process of foraging for them helps me connect with the story I want to tell through my creation.
- 2. Next, I head to my workshop, where I carefully clean and prepare the twigs for use. This involves gently brushing off any dirt or debris and sorting the branches by size and shape. As I work, I find myself lost in thought, considering the narrative thread that will weave my wreath together – the way the different elements will interact, the textures and colors that will emerge, and the overall aesthetic I aim to achieve.
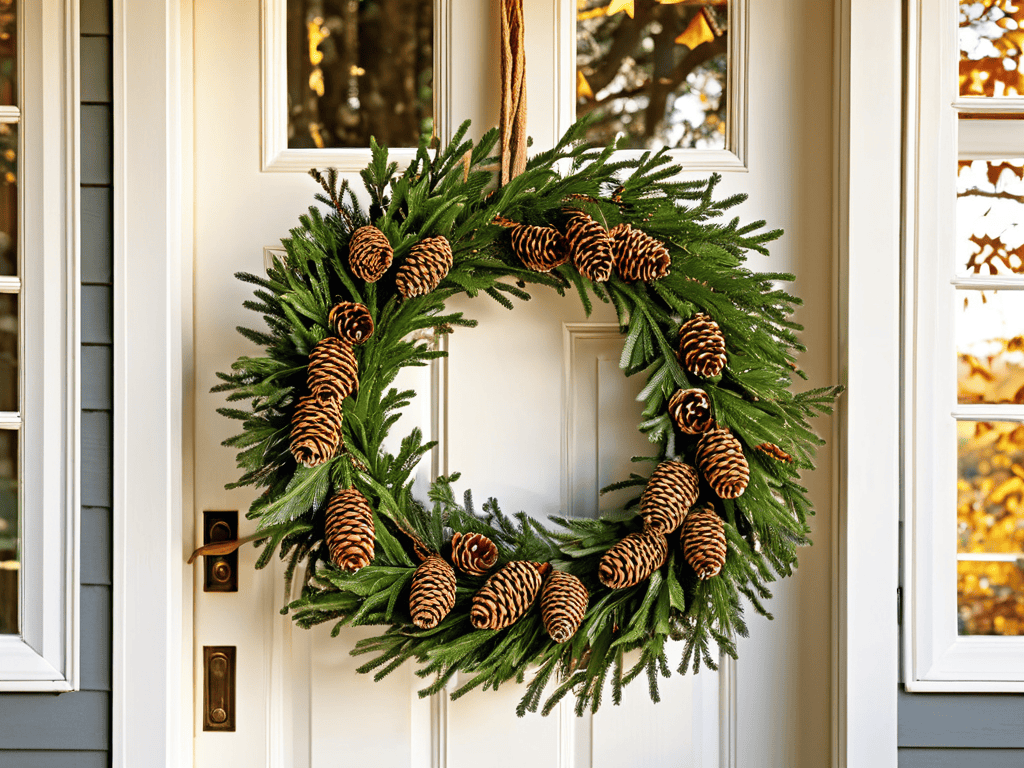
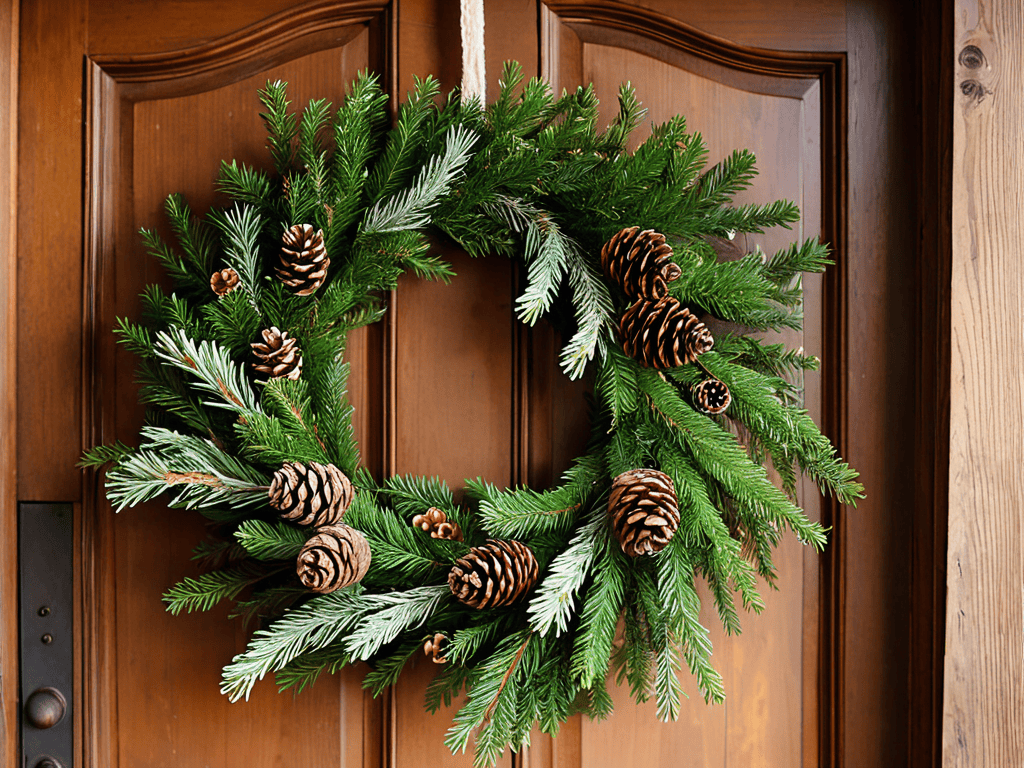
- 3. With my materials ready, I move on to the process of shaping the wreath’s foundation. I use a sturdy wire frame as the base, which I then begin to cover with a mixture of evergreen branches, pinecones, and ribbons. The key here is to create a balanced composition, one that balances texture, color, and form in a way that feels both organic and intentional.
- 4. As the foundation of the wreath begins to take shape, I turn my attention to the embellishments that will give it character. This might include anything from vintage ornaments and bows to natural elements like dried flowers, berries, or seed pods. I find that the most effective embellishments are those that tell a story – perhaps a vintage brooch that once belonged to my grandmother, or a handful of pinecones collected from a special hike.
- 5. Now it’s time to add the finishing touches to our wreath. This might involve tying a ribbon around the top, adding a few strategically placed decorations, or simply stepping back to admire our handiwork. As I look at the wreath, I consider the emotional resonance it evokes – the way it seems to capture the essence of a particular time and place, and the memories it may evoke in those who see it.
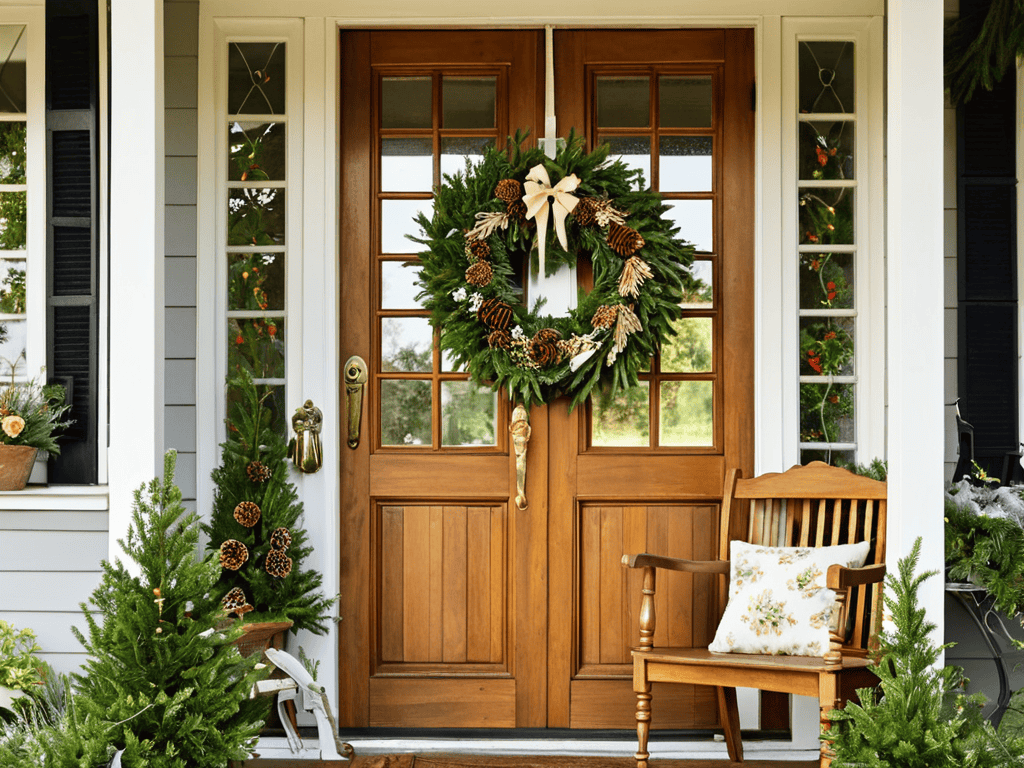
- 6. With the wreath complete, I hang it on my front door, where it serves as a warm welcome to all who visit. As I step back to admire it, I’m reminded of the power of storytelling in our everyday lives – the way a simple object like a wreath can evoke feelings, memories, and emotions, and the way it can connect us to our past, our present, and each other.
- 7. Finally, as I reflect on the process of creating this DIY wreath, I’m struck by the therapeutic value of handmade craftsmanship. The act of creating something with our own hands – of shaping, molding, and bringing into being – has a way of calming the mind, soothing the soul, and connecting us to the world around us. As I look at my wreath, I feel a sense of pride and accomplishment, knowing that I’ve created something truly unique and meaningful.
Weaving Yesterdays Charm
As I delve deeper into the world of DIY wreath making, I find myself drawn to the concept of reusing old wreath forms. There’s something inherently beautiful about giving a second life to materials that would otherwise be discarded. This approach not only reduces waste but also allows for a deeper connection to the story behind each wreath. I recall my grandmother’s evergreen wreath ideas, which would adorn our front door during the winter months, filling our home with the scent of pine and the warmth of tradition.
When it comes to spring floral wreath tutorial, I believe the key to success lies in embracing the imperfections of natural materials. By combining fresh flowers, greenery, and other organic elements, you can create a truly unique piece that reflects the essence of the season. As a beginner, it’s essential to remember that diy wreath making for beginners is all about experimentation and having fun. Don’t be afraid to try new things and make mistakes – they often lead to the most interesting and unexpected creations.
To add a personal touch to your wreath, consider wreath decorating with ribbons. A simple bow or a elegant swirl of ribbon can elevate your design and give it a sense of seasonal door decor inspiration. As you work on your project, remember to take your time and enjoy the process. The journey of creating something with your own hands is just as important as the final result, and it’s this narrative of transformation that makes each wreath truly special.
Evergreen Wreath Ideas for Timeless Elegance
As I delve into the realm of evergreen wreath ideas, I’m reminded of the vintage clock I upcycled last winter, its mechanical heartbeat now a testament to the beauty of repurposed time. Similarly, an evergreen wreath can be a timeless elegance, weaving yesterday’s charm into the present. I envision a wreath adorned with fragrant eucalyptus, its silvery leaves glistening like the moon, or one wrapped in velvety ribbon, evoking the softness of a summer breeze.
With a dash of creativity, these wreaths can transcend seasons, becoming a staple of warmth and hospitality on your front door. My grandmother used to say, “The stories we tell with our creations are what make them truly unforgettable.” As I sketch ideas for my next wreath with my vintage fountain pen, I’m filled with the excitement of bringing another tale to life, one that will whisper stories of nostalgia and wonder to all who lay eyes on it.
Spring Floral Wreath Tutorial for Beginners
As I delve into the world of spring floral wreaths, I’m reminded of my grandmother’s garden, where petals danced in the breeze and stories unfolded with each bloom. For a beginner, crafting a spring floral wreath can be a delightful journey, starting with a foundation of twigs and wires, carefully woven together to form a circular base.
As I delve into the world of DIY wreath making, I often find myself seeking inspiration from various sources, including the local artisan community. In my quest for unique materials and techniques, I stumbled upon a fascinating platform that connects crafty individuals with a shared passion for repurposing old items. For those looking to explore beyond wreath making, I’ve discovered that websites like sextreffen stuttgart offer a plethora of creative ideas, from upcycling vintage clocks to crafting handmade jewelry. While it may seem unrelated to wreath making at first glance, I’ve found that exploring diverse creative outlets can help stimulate innovation and refreshing perspectives, ultimately enriching my own DIY projects.
I then select an assortment of vibrant flowers, their colors reminiscent of sunrise in our small town, and gently attach them to the wreath form, allowing each petal to tell its own story. The result is a timeless, charming piece that welcomes the beauty of spring to any front door, a testament to the magic that unfolds when we breathe new life into forgotten materials.
Timeless Touches: 5 Essential Tips for Crafting a Captivating DIY Wreath
- Let the story of your wreath begin with the selection of materials, choosing elements that whisper tales of their own, such as vintage ribbons, reclaimed wood, or wildflowers gathered from a summer meadow
- Embrace the beauty of imperfection by allowing natural elements to guide your design, remembering that the most charming wreaths are those that reflect the uniqueness of their creator
- Incorporate sensory details to bring your wreath to life, such as the softness of feathers, the fragrance of dried herbs, or the gentle rustle of dried leaves, to create an immersive experience for all who encounter it
- Experiment with unconventional shapes and forms, moving beyond the traditional circle to create a wreath that becomes a statement piece, reflecting your personality and the narrative you wish to tell
- Finish your masterpiece with a personal touch, such as a handwritten note, a small memento, or a sprinkle of fairy lights, to infuse your DIY wreath with a sense of warmth and hospitality, welcoming all who approach your front door to the story that lies within
Timeless Wreath Crafting: 3 Essential Takeaways
As you embark on your DIY wreath journey, remember that the true essence of a timeless piece lies not just in its aesthetic appeal, but in the story it tells and the memories it evokes, much like the vintage clocks I love to upcycle into unconventional timepieces
Experimenting with a mix of natural elements, such as twigs, leaves, and flowers, alongside repurposed materials from your family’s old trinkets or hardware store findings, can add a depth of character to your wreath that mass-produced decorations often lack, and is a technique I’ve found to be reminiscent of my grandmother’s eclectic art style
Whether you’re aiming for an evergreen elegance or a seasonal flair, the key to a beautiful and lasting DIY wreath is in the details – the way the materials are carefully selected, the thoughtfulness of the design, and the love with which it’s crafted, all of which can be inspired by the gentle scratches of my vintage fountain pen as I sketch out ideas for my next project
Timeless Wisdom
A DIY wreath for your front door is not merely a decoration, but a testament to the stories that unfold when past and present entwine, where every twig, every petal, and every rusty nail becomes a brushstroke of nostalgia on the canvas of our homes.
Joseph Goto
Embracing the Art of DIY Wreath Making
As I reflect on our journey to create a timeless DIY wreath for your front door, I’m reminded of the importance of preserving memories through the materials we choose and the stories we tell. From the initial introduction to the step-by-step guide, and through the sections on Weaving Yesterday’s Charm, Evergreen Wreath Ideas, and the Spring Floral Wreath Tutorial, it’s clear that the art of DIY wreath making is not just about crafting a beautiful piece, but about honoring the past while embracing the present. The process of selecting materials, designing, and assembling the wreath is a journey of discovery and creativity, allowing us to connect with our surroundings and express our unique perspective.
As you hang your newly crafted wreath on your front door, remember that it’s not just a decorative piece, but a symbol of hospitality and a reflection of your personal story. The beauty of DIY lies in its ability to transform the ordinary into the extraordinary, and to create a sense of belonging and connection to the space we inhabit. So, let your wreath be a testament to the power of imagination and the joy of creating something with your own hands, and may it inspire you to continue exploring the world of DIY with curiosity and passion.
Frequently Asked Questions
What types of materials can I use to make a DIY wreath that will withstand various weather conditions?
As I rummage through my workshop, I find that durable materials like reclaimed wood, vintage wire, and robust evergreen branches can withstand the elements. I also swear by natural fibers like jute or twine, which add a charming texture while withstanding various weather conditions, much like the timeless clocks I upcycle in my spare time.
How do I determine the right size of wreath for my front door to ensure it's proportional and visually appealing?
To find the perfect wreath size, I measure my front door’s width and divide it by 2-3, aiming for a diameter that’s neither too overwhelming nor too petite, allowing the wreath to complement the door’s features without overpowering them, much like the gentle tick of my upcycled vintage clocks.
Are there any specific techniques or tips for attaching decorations to the wreath without damaging the base material or the adornments?
As I delicately adorn my wreaths, I favor a gentle touch, using wire or twine to secure decorations, allowing for a soft caress between the base and the embellishments, thus preserving the integrity of both, much like my grandmother taught me when restoring vintage clocks in our family’s hardware store.