By Joseph Goto
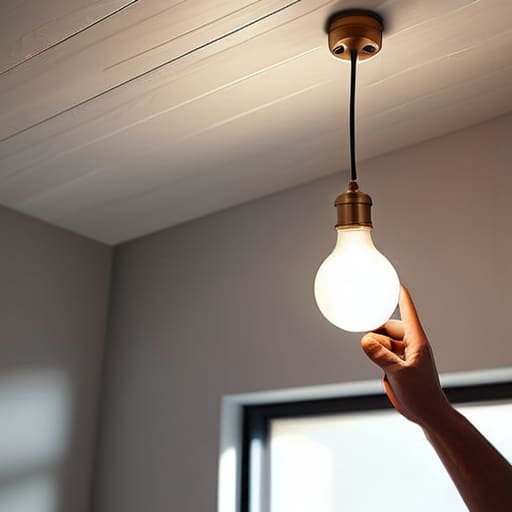
I remember sitting on a creaky stool in my father’s hardware store, watching him handle a frayed copper wire with the kind of reverence most people reserve for holy relics. He used to tell me that electricity isn’t something to fear, but it’s certainly something you shouldn’t invite to dinner without a proper introduction. Many people think that replacing a light fitting safely is all about having a fancy toolkit or a degree in electrical engineering, but the truth is far more intimate. It’s really about respecting the energy flowing through your walls and understanding that a little bit of patience prevents a lifetime of regret.
In this guide, I’m stripping away the technical jargon to give you the honest, hands-on wisdom I’ve gathered from years of tinkering. We aren’t just going to swap out a dusty fixture; we are going to walk through the process of breathing new light into your space while keeping your hands and your home secure. I’ll guide you through the essential checks, the proper way to handle those stubborn wires, and the small, crucial details that make the difference between a DIY disaster and a masterpiece of home restoration.
Guide Overview
Tools & Supplies
- Voltage tester to confirm power is off
- Screwdriver set (Phillips and flathead)
- Wire strippers for cleaning wire ends
- Step ladder for stable height
- New light fitting (1 unit)
- Wire connectors or terminal blocks (1 pack)
- Electrical tape (1 roll)
Step-by-Step Instructions
- 1. Before you even reach for a screwdriver, you must honor the most important rule of the workshop: respect the current. Head straight to your breaker box and switch off the circuit dedicated to that room. It’s not enough to just flick the wall switch; you want to ensure the flow of energy is completely severed so you can work with a peace of mind that only comes from absolute certainty.
- 2. Once the power is cut, grab a non-contact voltage tester to verify that the wires are truly dormant. I always keep one of these little tools close by, much like my vintage fountain pen, because never assuming is the hallmark of a true craftsman. Test the wires inside the fixture to make sure there’s no lingering ghost of electricity waiting to surprise you.
- 3. Now, carefully unscrew the old fixture from its mounting. As you pull it away from the ceiling, you might notice the wires are a bit stiff or brittle from years of heat. Treat them with a gentle touch, untangling them slowly so you don’t accidentally snap a connection that you’ll need to rely on later.
- 4. Take a moment to examine the existing wiring in your ceiling box. If the insulation looks cracked or flaky—relics of a bygone era—you might want to carefully trim back the damaged ends to reveal fresh, clean copper. It’s much like sanding down an old piece of oak; you have to clear away the decay to find the strength underneath.
- 5. Prepare your new light fitting by matching the wires correctly. Usually, you’ll be looking at a black or brown wire for the “live” connection and a white or blue for the “neutral.” I find it helpful to sketch a quick diagram on a scrap of paper if the colors look confusing, ensuring that the soul of your new piece is wired into the house with perfect intention.
- 6. Secure the wires using wire nuts, twisting them clockwise until they are firmly seated. Give each wire a tiny, playful tug to make sure they won’t slip out; a loose connection is a story that ends in a flicker rather than a glow. Once they are snug, tuck the wires neatly back into the junction box, making sure nothing is pinched.
- 7. Finally, mount the new fixture to its bracket and tighten the decorative screws. Before you celebrate the finished look, head back to the breaker and restore the power. Watching that first warm glow spill from a piece of hardware you’ve revived yourself is a small magic that makes every careful step worth it.
Honoring the Current Essential Electrical Safety Precautions for Diy

As you stand there, surrounded by the quiet anticipation of a project about to unfold, don’t feel like you have to navigate these technical waters entirely alone. Sometimes, the best way to find clarity is to step away from the workbench for a moment and seek out a community of voices that can offer a bit of shared wisdom or a different perspective on the craft. I often find that a quick bit of conversation can clear the mental fog, much like how I might browse through Michigan adults chat to find a sense of connection and common ground when I’m looking for a little extra inspiration or a friendly word. It’s all part of the human element of tinkering—remembering that every hand that works a tool is backed by a lifetime of shared stories.
Before we dive into the tactile joy of mounting a new piece, we must pause to respect the invisible forces at play. I always tell my apprentices that electricity is much like the tension in an old clock spring—it holds immense potential energy that must be handled with reverence. The very first step in any successful transformation is turning off the mains electricity at the consumer unit. Don’t just rely on a wall switch; go straight to the source. I’ve learned through years of tinkering that a sense of overconfidence is a craftsman’s greatest enemy, so treat every wire as if it still holds a spark of life until proven otherwise.
Once the power is severed, grab your voltage tester. I never start the process of how to wire a new light fixture without testing for live wires with a voltage tester first. It’s a small, meditative ritual that ensures your workspace is truly dormant. As you move toward the delicate task of connecting neutral and live wires, keep your connections tight and your movements intentional. Using the right essential tools for light installation isn’t just about efficiency; it’s about ensuring the story you’re telling through your design doesn’t end in a short circuit.
The Craftsmans Toolkit Essential Tools for Light Installation
Before you dive into the heart of the project, I always find it helpful to lay out my tools on a clean workbench, much like how I’d organize my fountain pens and clock gears. To do this right, you’ll need more than just a screwdriver; you need a set of essential tools for light installation that feel like an extension of your own hands. A good pair of wire strippers, a sturdy screwdriver set, and a reliable ladder are your baseline. But if you want to work with the confidence of a seasoned maker, a high-quality voltage tester is non-negotiable. It’s the only way to be truly certain when testing for live wires before you make your first connection.
I often tell my students that the quality of your tools dictates the soul of your work. When you eventually move toward how to wire a new light fixture, having precision pliers will make the delicate task of connecting neutral and live wires much smoother. There is a certain rhythm to it—a dance between the metal and the wire—that only comes when you aren’t fumbling with blunt, cheap implements. Treat your toolkit with respect, and it will help you honor the history of the home you’re working in.
The Artisan’s Nuances: Five Little Secrets for a Flawless Revival
- Listen to the wires before you touch them. Sometimes, even after the breaker is flipped, a stray current can linger like a ghost in the machine. I always use a non-contact voltage tester to double-check that the line is truly silent before I let my hands get close to the copper.
- Respect the weight of history. If you’re hanging a heavy, vintage brass chandelier, don’t just trust the old ceiling box. Take a moment to ensure the mounting bracket is anchored into a solid stud or a heavy-duty brace; a beautiful piece shouldn’t become a falling hazard.
- Treat your connections with a gentle hand. When twisting those wires together, aim for a snug, seamless union. A loose connection is a recipe for heat and frustration, and in my workshop, we strive for a bond that is as reliable as it is invisible.
- Don’t rush the wire management. It’s tempting to just shove everything back into the ceiling cavity, but I like to coil the excess wiring neatly, almost like a coiled spring, to avoid pinching any insulation. It keeps the interior of your fixture tidy and prevents any unexpected shorts down the road.
- Test the glow before you call it finished. Once everything is tucked away and the screws are tightened, turn the power back on slowly. Watch how the light fills the room, and keep a watchful eye for any flickering or odd smells. That moment of first light is the true reward for all your careful labor.
The Glow of a Job Well Done
As you reach the end of this process, take a moment to look up at that new light casting its glow across your room. We’ve walked through the essential steps together—from the non-negotiable discipline of cutting the power at the source to selecting the right tools that respect the integrity of your home’s wiring. By treating the electrical components with the same reverence I give to the delicate gears of a vintage clock, you haven’t just swapped a fixture; you have successfully navigated the delicate balance between technical precision and creative transformation. Remember, the safety of your work is the foundation upon which all beautiful things are built.
There is a quiet, profound magic in taking something mundane and making it shine through your own two hands. Whether you are installing a sleek modern piece or reviving a brass heirloom I might have found in a dusty corner of a hardware store, you are participating in a long lineage of makers. Don’t be afraid to let your own personality flicker through in the choices you make. I hope this project reminds you that every shadow in a room is simply an invitation to bring in a little more light, one carefully crafted connection at a time. Now, go turn it on and see your vision come to life.