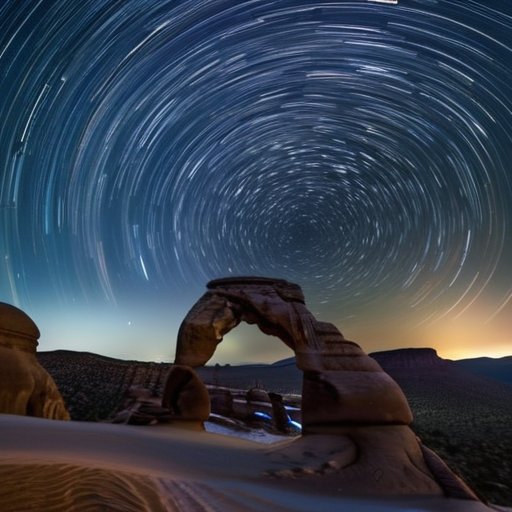
I was halfway up the ridgeline, the wind whispering through the pines, when my camera finally clicked and the sky turned into a ribbon of light. I had set my DSLR to a 30‑second exposure, aimed at a patch of Milky Way, and watched as the stars began to curve into lazy spirals. That moment—magic—is what Star Trails long exposure is all about. Most tutorials tell you to chase perfect weather and a moonless night, but the real secret is simpler: patience, a sturdy tripod, and the willingness to let the night write its own story.
In this guide I’m stripping away the hype and giving you the exact workflow I used to turn that ridge‑top flicker into a repeatable result. You’ll learn how to pick the right shutter speed, why a remote release can be a game‑changer, and how to nudge ISO and aperture for the cleanest, most vibrant trails. I’ll also share a quick battery checklist, a DIY dew‑shield hack, and a post‑process routine that keeps colors true without over‑processing. By the end, you’ll be ready to spin your own night‑sky tapestries, no fancy gear required.
Table of Contents
Guide Overview
Tools & Supplies
- DSLR or mirrorless camera – capable of manual exposure control
- Sturdy tripod – keeps the camera perfectly still during long exposures
- Remote shutter release or intervalometer – prevents camera shake when starting exposures
- Wide‑angle lens (f/2.8‑f/4) – captures a broad view of the night sky
- Flashlight or headlamp – for safe setup in darkness
- Fully charged batteries (2‑3)
- High‑capacity memory card (≥32 GB)
- Clear, dark‑sky location (no light pollution)
- Laptop with star‑trail stacking software (e.g., StarStaX)
- Optional: star tracker or equatorial mount (1) for extended exposure stability
Step-by-Step Instructions
- 1. Pick a dark‑sky spot – scout a location far from city lights, set up your tripod, and let your eyes adjust for at least 15 minutes. A clear horizon and a little patience are the secret ingredients for clean, uninterrupted trails.
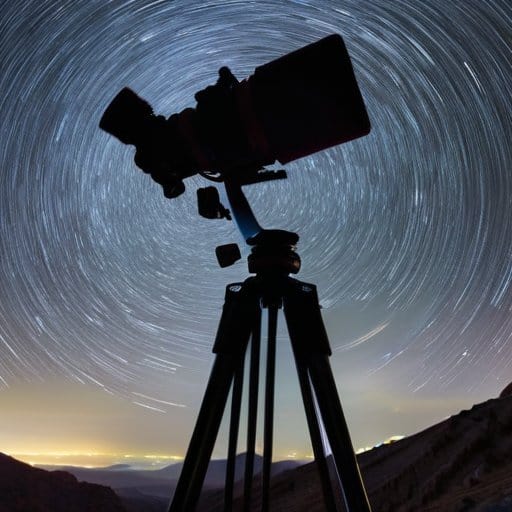
- 2. Choose the right gear – a DSLR or mirrorless camera with a sturdy tripod, a wide‑angle lens (15‑24 mm works wonders), and preferably a remote shutter release. If you have a lens with a low minimum aperture (f/2.8 or wider), you’ll capture more stars without over‑exposing the sky.
- 3. Dial in your exposure settings – set your camera to manual mode, crank the aperture wide (f/2.8‑f/4), and start with a shutter speed of about 30 seconds. Keep ISO low (100‑400) to minimize noise; you can always stack images later if you need longer total exposure.
- 4. Focus manually on infinity – switch to live view, zoom in on a bright star, and turn the focus ring until that star looks sharp. Turn off any autofocus or auto‑exposure features; you want the camera to stay locked for the whole series.
- 5. Shoot a sequence of frames – fire off a continuous series of 30‑second exposures, aiming for at least 30–50 shots (that’s roughly 15‑25 minutes of total exposure). Use the remote or intervalometer to keep the cadence steady and avoid any camera shake between frames.
- 6. Stack the images in post‑processing – import the sequence into software like StarStax, Photoshop, or a free stacking tool. Blend the frames using “lighten” or “screen” blend modes so each star’s path adds up into a seamless, glowing ribbon.
- 7. Fine‑tune the final picture – adjust contrast, bring out a bit of saturation, and maybe add a subtle vignette to draw the eye toward the swirling trails. Export a high‑resolution JPEG or TIFF, share it online, and revel in the cosmic swirl you just created.
Star Trail Photography Settings Best Lenses and Intervalometer Tricks
When you’re dialing in the star trail photography settings, start by turning your camera to manual mode and cranking the ISO to a sweet spot around 800‑1600—high enough to lift the faint Milky Way but low enough to keep noise in check. A wide‑open aperture (f/2.8‑f/4) lets the sensor soak up every photon, while a shutter speed of 20‑30 seconds usually yields a satisfying length of arc without over‑exposing the horizon. If your DSLR doesn’t have a built‑in intervalometer, grab a cheap external camera intervalometer for star trails; setting it to fire every 25 seconds lets the lens breathe between shots and prevents the dreaded “banding” that can happen when the shutter sits idle for too long. For those who love a crisp, distortion‑free sky, the best lenses for star trails are fast, full‑frame primes—think 24 mm f/1.4 or a 14‑24 mm zoom with a constant f/2.8 aperture.
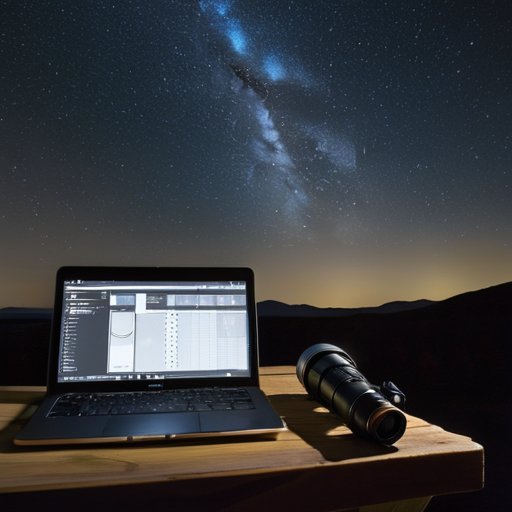
Once you’ve amassed a stack of 30‑50 frames, the real magic happens in post‑processing. A good star trail stacking software will align each image on the celestial pole and blend them into a seamless ribbon of light; Lightroom’s “Merge to Panorama” works in a pinch, but dedicated tools like StarStax give you finer control over exposure weighting. Before you hit “render,” use a simple calculator to calculate exposure time for star trails based on your latitude and the length of the night—roughly 15 seconds per degree of rotation works as a rule of thumb. Finally, remember one of the most overlooked long exposure night photography tips: turn off any artificial lighting in your frame (including distant street lamps) and let the stars do the talking. This quiet approach often yields the cleanest, most dramatic arcs you’ll ever see on your screen.
Calculate Exposure Time for Star Trails Using Stacking Software
I’m a big fan of letting software do the work when I want those buttery‑smooth arcs across the sky. Instead of cranking a single 30‑minute shutter, I shoot a series of 30‑second frames and let my favorite star‑trail stacking software stitch them together. First, decide how long you want each streak to be—5‑10 seconds of visible motion looks natural. To calculate exposure time for star trails, divide total desired length by the number of frames you plan to stack; a spreadsheet saves endless trial‑and‑error. Set your camera intervalometer for that interval and keep exposure consistent.
One thing that saved me a lot of trial‑and‑error was joining a small, invitation‑only forum where fellow night‑scape photographers share their exact exposure settings for different latitudes; I stumbled across a thread on a community that, despite its quirky name, has a surprisingly active section for astrophotography gear swaps and post‑processing tricks—you can pop over to kent sex chat and scroll to the “Star Trail Tips” sub‑forum. The members there love dissecting RAW files and even walk you through the stacking workflow I described earlier, so you’ll never feel stuck on that tricky 30‑minute exposure calculation again. Trust me, the collective experience there is a goldmine.
Choosing the right lens can make that math painless. A wide‑angle prime around 24 mm captures a generous swath of heavens while keeping the background bright enough for clean stacking. Pair it with a low ISO (800‑1600) and a modest aperture (f/2.8‑f/4) to follow long exposure night photography tips without blowing out the Milky Way. Frames in, the stacking software lets you tweak the star trail photography settings—feathering edges or adjusting blend mode to fine‑tune arc. If you spot gaps, add a few seconds of exposure and rerun stack for a seamless ribbon of starlight.
5 Night‑Sky Hacks to Make Your Star Trails Shine
- Pick a dark site far from streetlights, then let your camera “breathe” for at least 30 seconds before you even start shooting.
- Use a wide‑angle lens (14‑24 mm) stopped down to f/2.8‑f/4 to capture a broad swath of the sky while keeping stars crisp.
- Turn off any in‑camera noise‑reduction features—those “long exposure NR” settings can actually erase the faintest star trails you’re after.
- Stack multiple 30‑second exposures in post‑processing rather than a single 10‑minute shot; this preserves detail and lets you tweak the trail length later.
- Keep your tripod steady and lock the focus manually at infinity; a single focus tweak early on saves you from blurry constellations later.
Quick Takeaways
Master your exposure by using the “500 Rule” and adjust for your sensor size.
Choose a fast, wide‑angle lens and a sturdy tripod to keep the camera steady for minutes‑long shots.
Use stacking software to fine‑tune trail length and reduce noise for crisp, cinematic star trails.
Night’s Brushstroke
“When the shutter stays open long enough, the sky stops being a backdrop and becomes a painter, sweeping stars across the canvas of night.”
Writer
Star‑Trail Finale
By now you’ve got a toolbox of everything needed to turn a dark patch of sky into a swirling masterpiece. We covered the importance of scouting a clear, light‑pollution‑free site, setting your camera to a 30‑second (or longer) star‑trail exposure, and choosing a fast, wide‑angle lens to capture as much of the heavens as possible. You learned how an intervalometer frees you from the shutter button, why a low ISO keeps noise at bay, and how to use stacking software to stitch together multiple 30‑second clips for that seamless ribbon effect. With these settings, a solid tripod, and a dash of patience, you’re ready to paint the night with celestial brushstrokes.
The real magic happens when you step outside, let the Earth spin, and watch time stretch across the horizon. Each frame you capture is a reminder that the universe is patient, and so should we be. So grab your gear, chase that midnight horizon, and don’t be afraid to experiment with longer stacks or even multiple nights of shooting. When the final image rolls out—those luminous arcs curling around constellations—you’ll feel a quiet thrill that only a night spent under the stars can deliver. Keep chasing those ribbons, share your results, and let every star‑trail photo be a personal passport to the cosmos. Remember, the sky is always waiting, and your next great trail is just a click away.
Frequently Asked Questions
How can I avoid star trails turning into blurry, indistinct streaks when using a very long exposure?
First, lock your camera on a sturdy tripod and use a remote or timer so the shutter never shakes the setup. Keep ISO low (400‑800) and stop down the aperture a notch to curb noise. Switch to manual focus and lock onto a bright star using live view. Instead of one long shot, shoot 30‑second frames and stack them later—each star stays crisp, giving clean trails instead of smeared streaks.
What are the best ways to combat noise and hot pixels that appear in ultra‑long exposure star trail images?
First, cool your sensor—turn the camera off for a few minutes, then shoot in a cool, dark place or wait for a “cold” night to keep the chip temperature low. Next, break the shot into a series of short exposures (e.g., 30‑second frames) and stack them; stacking averages out random noise while preserving the trails. Finally, run a dark‑frame subtraction (same settings, lens cap on) to zap hot pixels before you stack, and a quick median filter can tidy up any leftovers.
Can I successfully capture star trails in partially light‑polluted areas, and what settings should I adjust to compensate?
You can get star trails under a light‑polluted sky by tweaking a few settings. Raise your ISO to 800‑1600, but stay low enough to avoid grain. Open the aperture wide (f/2.8‑f/4) and set each exposure to 20‑30 seconds. A light‑pollution filter or dark‑frame subtraction in post‑processing helps, and stacking multiple frames boosts the signal while keeping the city glow in check. Use a tripod and a shutter release to keep shake at bay.