
I still remember the first time I encountered 3D printing problems. I was working on a miniature diorama of the Eiffel Tower, and my 3D printer decided to jam on me – not once, not twice, but three times. The frustration was palpable, and I couldn’t help but think that all the hype surrounding 3D printing was just that – hype. It seemed like every article or video I came across was touting the technology as a revolutionary game-changer, but no one was talking about the real issues that us mere mortals face when trying to bring our ideas to life.
As someone who’s spent countless hours navigating the ups and downs of 3D printing, I’m here to offer you a no-nonsense guide to overcoming the common obstacles that stand between you and your creative vision. In this article, I’ll be sharing my personal experiences and hard-earned wisdom on how to troubleshoot and solve 3D printing problems, from jammed extruders to misaligned prints. My goal is to provide you with practical advice that’s grounded in reality, not theory – so you can focus on bringing your ideas to life, rather than getting bogged down in technical jargon or unrealistic expectations.
Table of Contents
- Unlocking 3d Printing Problems
- Calibrating the Compass 3d Printer Calibration Techniques
- Taming the Waves Solving Warping Problems in 3d Prints
- Navigating 3d Print Challenges
- Anchoring the Print 3d Print Bed Adhesion Solutions
- Charting the Course Troubleshooting 3d Print Layer Shifting
- Staying on Course: 5 Essential Tips for Overcoming 3D Printing Problems
- Key Takeaways for Smoother Sailing
- Navigating the Uncharted
- Reflections on the Horizon
- Frequently Asked Questions
Unlocking 3d Printing Problems
As I delve into the world of 3D printing, I’ve encountered a multitude of challenges that have put my problem-solving skills to the test. One of the most frustrating issues I’ve faced is warping, which can render an otherwise perfect print useless. To combat this, I’ve had to develop a range of solving warping problems in 3d prints techniques, from tweaking the print bed temperature to experimenting with different adhesive solutions.
Through trial and error, I’ve learned that 3d print bed adhesion solutions are crucial in preventing warping and ensuring a successful print. I’ve also discovered that 3d printer calibration techniques can make all the difference in achieving precise and accurate prints. By fine-tuning my printer’s settings and maintaining a clean and well-calibrated machine, I’ve been able to minimize errors and produce high-quality prints.
As I continue to navigate the complexities of 3D printing, I’m constantly on the lookout for new tips and tricks to improve my craft. Whether it’s troubleshooting 3d print layer shifting or maintaining my printer’s nozzles with regular maintenance tips for 3d printer nozzles, I’m always seeking ways to refine my process and push the boundaries of what’s possible with this technology.
Calibrating the Compass 3d Printer Calibration Techniques
As I delve into the world of 3D printing, I’m reminded of the importance of precise calibration. Just like my trusty compass, a 3D printer needs to be calibrated to point towards accurate prints. I’ve found that a well-calibrated printer can make all the difference in the quality of the final product.
To achieve this, I’ve experimented with various calibration techniques, from adjusting the printer’s bed level to fine-tuning the extruder’s temperature. It’s a process that requires patience and attention to detail, but the end result is well worth the effort.
Taming the Waves Solving Warping Problems in 3d Prints
As I delve into the world of 3D printing, I’ve found that warping problems can be a significant hurdle to overcome. It’s a bit like navigating through treacherous waters, where even the slightest miscalculation can lead to disaster. I’ve seen my fair share of prints gone wrong, with layers separating or edges curling up like a ship in a storm.
To mitigate warping, I’ve learned to adjust my printing settings and material choices carefully. It’s all about finding the right balance, much like calibrating my trusty compass to point me in the right direction. By doing so, I can ensure that my prints come out smooth and even, with no signs of warping or distortion, and that’s a truly satisfying feeling.
Navigating 3d Print Challenges

As I delve into the world of 3D printing, I’ve come to realize that solving warping problems in 3d prints is an art that requires patience and precision. It’s a bit like navigating through treacherous waters, where one wrong move can lead to a failed print. I’ve found that 3d printer calibration techniques play a crucial role in preventing warping issues, and it’s essential to get it just right.
During my travels, I’ve met many makers who struggle with common fff printing issues, including warping and layer shifting. To overcome these challenges, I recommend troubleshooting 3d print layer shifting by adjusting the print bed adhesion and nozzle temperature. It’s also essential to keep the printer nozzle clean and well-maintained, as clogged nozzles can lead to a range of problems.
By following these tips and staying vigilant, makers can minimize the risk of print failures and produce high-quality prints. 3d print bed adhesion solutions can also make a significant difference, and I’ve found that using a combination of adhesion methods can help prevent warping and ensure a successful print. With practice and perseverance, anyone can master the art of 3D printing and create stunning prints that rival those of experienced makers.
Anchoring the Print 3d Print Bed Adhesion Solutions
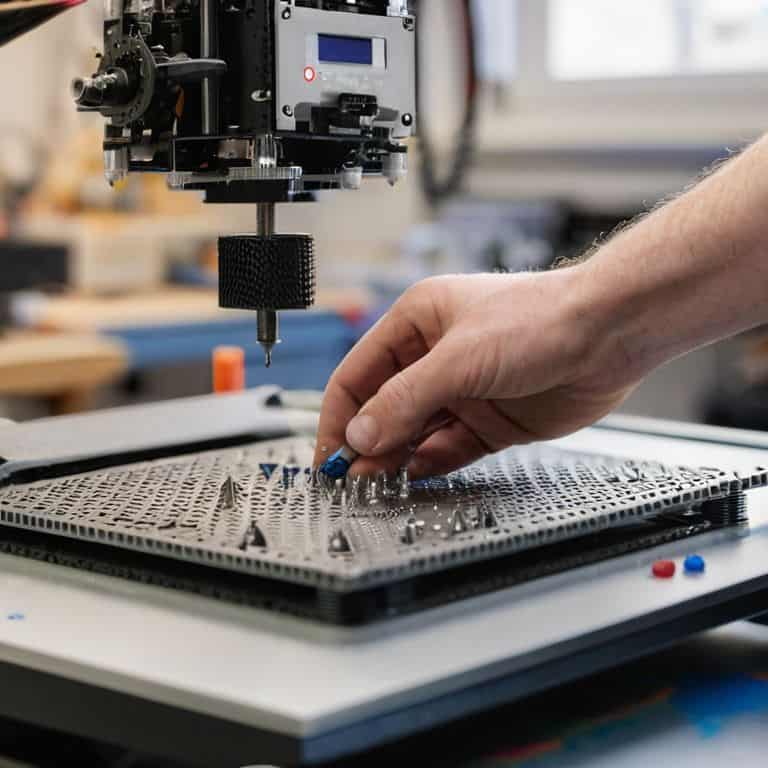
As I delve into the world of 3D printing, I’ve found that bed adhesion is a crucial factor in determining the success of a print. A well-adhered print bed can make all the difference between a flawless print and a failed one. I’ve experimented with various techniques, from using adhesive sprays to applying a thin layer of glue, and I’ve found that each method has its own unique advantages and disadvantages.
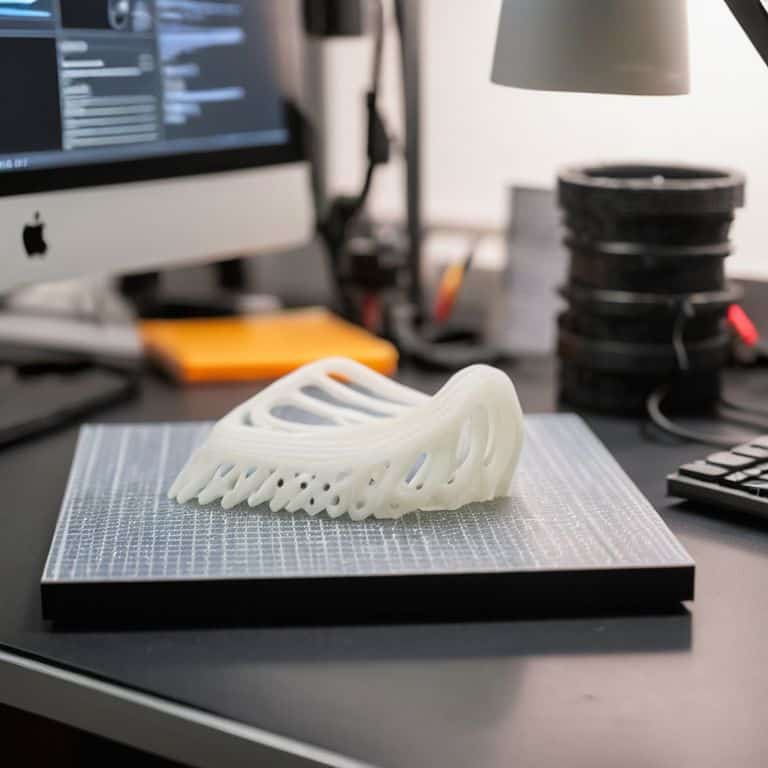
In my experience, proper surface preparation is essential for ensuring a strong bond between the print and the bed. This can be achieved by cleaning the bed thoroughly and applying a thin layer of adhesive material. By doing so, I’ve been able to reduce the likelihood of print failures and achieve more consistent results, allowing me to focus on the creative aspects of 3D printing, like building intricate miniature dioramas.
Charting the Course Troubleshooting 3d Print Layer Shifting
As I delve into the world of 3D printing, I’ve encountered my fair share of layer shifting issues, where the print seems to slip out of alignment, leaving a messy trail in its wake. It’s a bit like trying to navigate through uncharted waters, where even the slightest miscalculation can lead to disaster. I’ve found that paying attention to the printer’s belt tension and pulley alignment can make all the difference in preventing such mishaps.
When troubleshooting layer shifting, I’ve learned to start with the basics, checking for any loose screws or misaligned components. A consistent printing environment is also crucial, as changes in temperature or humidity can affect the print’s accuracy. By carefully evaluating these factors, I’ve been able to identify and resolve issues that would have otherwise derailed my printing projects.
Staying on Course: 5 Essential Tips for Overcoming 3D Printing Problems
- Keep a weather eye on your printer’s maintenance, just like I keep my grandfather’s compass in good condition – regular checks can prevent a world of trouble
- Experiment with different filament types and settings to find the perfect balance for your prints, much like finding the right route through unfamiliar waters
- Don’t be afraid to try new calibration techniques, and remember that patience is key – just as a sailor waits for the right winds, you might need to wait for the right settings
- Understand that warping and layer shifting are common issues, but with the right adhesion solutions and troubleshooting, you can smooth out even the most turbulent of prints
- Join a community of fellow makers and learn from their experiences – just as sailors share tales of their voyages, we can share our successes and failures to navigate the challenges of 3D printing together
Key Takeaways for Smoother Sailing
I’ve learned that mastering 3D printer calibration is crucial, much like adjusting my grandfather’s compass to navigate through life’s challenges – it’s all about finding that perfect balance to reach your destination
From my travels and experiments, I’ve found that solving warping problems and ensuring proper print bed adhesion can make all the difference between a successful print and a failed one, a bit like choosing the right anchor for your ship
Troubleshooting layer shifting and other common issues requires patience, persistence, and a willingness to learn from mistakes, rather like charting a new course through unexplored waters – it’s a journey that requires dedication, but yields great rewards for those who persevere
Navigating the Uncharted
The true art of mastering 3D printing lies not in avoiding problems, but in embracing them as opportunities to chart new courses and discover innovative solutions.
Steven Wells
Reflections on the Horizon
As I reflect on our journey through the realm of 3D printing problems, it’s clear that calibration and troubleshooting are essential skills for any maker. From calibrating the compass of our 3D printers to taming the waves of warping and anchoring our prints, we’ve navigated a myriad of challenges. By charting the course through layer shifting and understanding the importance of 3D print bed adhesion, we’ve equipped ourselves with the tools necessary to overcome even the most daunting obstacles. Whether you’re a seasoned sailor or just setting foot on the shores of 3D printing, remembering that every challenge is an opportunity for growth is key.
As we conclude our exploration of 3D printing problems, I’m reminded of the power of perseverance and the importance of community. The world of 3D printing is vast and wondrous, full of uncharted territories waiting to be discovered. So, let us set sail with curiosity and creativity, inspired by the knowledge that every print, every project, and every problem solved brings us closer to a world where imagination knows no bounds. And as my trusty compass would suggest, the next great story, the next innovation, is just on the horizon, waiting for us to find it.
Frequently Asked Questions
What are the most common causes of 3D printing failures and how can I troubleshoot them?
As I ponder the perplexities of 3D printing, I’ve found that failures often stem from misaligned printers, incorrect temperature settings, or poor bed adhesion. To troubleshoot, I recommend checking your printer’s calibration, ensuring proper temperature control, and experimenting with different adhesion methods – it’s a process of trial and error, but with patience and practice, you’ll be navigating those treacherous waters in no time.
How can I prevent warping and cracking in my 3D prints, especially when working with sensitive materials?
To prevent warping and cracking, I’ve found that a combination of proper bed adhesion, optimized printing temperatures, and gentle handling can work wonders. For sensitive materials, try using a raft or brim to increase surface contact, and experiment with different infill densities to reduce stress on the print.
What are some advanced techniques for calibrating my 3D printer to ensure precise and accurate prints, and how often should I perform maintenance checks?
As I tweak my own 3D printer, I’ve found that advanced calibration techniques like delta calibration and mesh bed leveling can make a world of difference. Regular maintenance checks, ideally every 100 hours of printing, help prevent issues like worn-out belts or misaligned axes, ensuring my prints remain precise and accurate.