As I sat at my desk, surrounded by half-finished miniature dioramas and the faint scent of paint, I couldn’t help but think about the countless hours I’ve spent trying to optimize 3D printing designs. It’s a task that can be as frustrating as navigating through uncharted waters, but also as rewarding as discovering a hidden cove. I recall the early days of my travel journalism career, when I would marvel at the intricate models of landmarks I encountered in my travels, and how they sparked a sense of wonder in me. Now, I aim to inspire that same sense of wonder in others, by sharing my knowledge on how to create efficient and beautiful 3D printed designs.
In this guide, I promise to share my honest and practical advice on how to streamline your design process and create stunning 3D printed models. I’ll walk you through the essential steps to optimize your designs, from choosing the right materials to tweaking the smallest details. Whether you’re a seasoned maker or just starting out, my goal is to provide you with the tools and confidence to bring your most ambitious projects to life. By the end of this article, you’ll be equipped with the knowledge to elevate your 3D printing skills and create designs that are both functional and visually striking. So, let’s set sail on this journey together and explore the exciting world of optimized 3D printing designs.
Table of Contents
Guide Overview: What You'll Need
Total Time: 1 hour 45 minutes
Estimated Cost: $0 – $100
Difficulty Level: Intermediate
Tools Required
- Computer with 3D modeling software (e.g., Blender, Tinkercad)
- 3D printer (with slicing software)
- Calipers (for measuring model dimensions)
- Ruler (for checking print bed size)
Supplies & Materials
- 3D printing filament (various colors and types)
- Support material (e.g., raft, brim, or supports)
- Adhesive (e.g., glue, tape, or boron carbide) for print bed
- 3D model files (in STL or OBJ format)
Step-by-Step Instructions
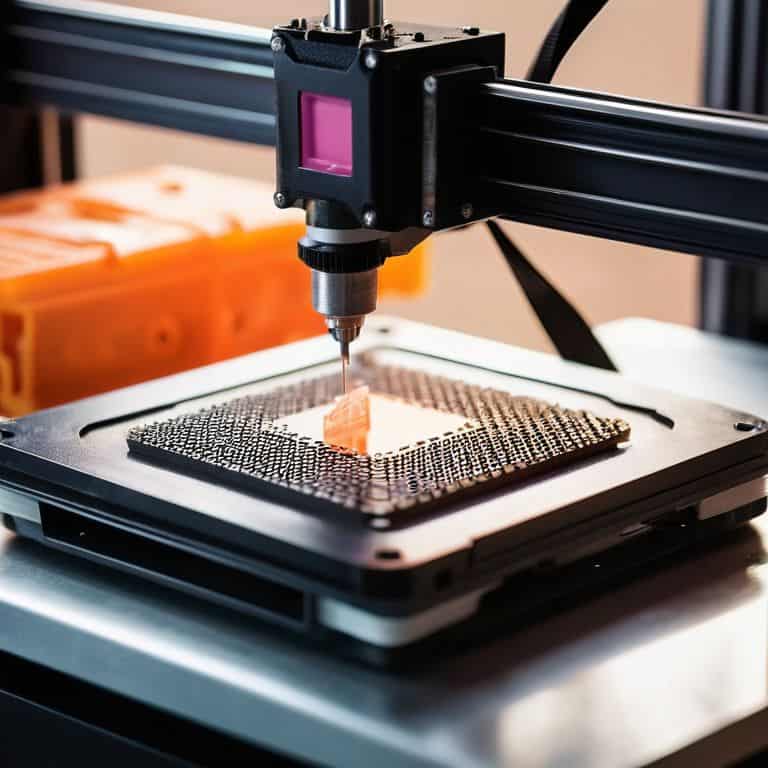
- 1. First, let’s start by understanding the importance of simplicity in 3D printing designs. A complex design can lead to a multitude of issues, including increased printing time, higher material usage, and a greater likelihood of print failures. To optimize our designs, we need to strip away unnecessary elements and focus on the core components that make our design functional and aesthetically pleasing.
- 2. Next, we need to consider the orientation of our design on the print bed. The way our design is positioned can significantly impact the printing process, affecting factors such as material usage, print speed, and the likelihood of warping or cracking. By experimenting with different orientations, we can find the optimal position that balances these factors and results in a high-quality print.
- 3. Now, let’s talk about infills and densities. The infill density and pattern can greatly impact the strength, weight, and print time of our design. A higher infill density can result in a stronger print, but it also increases material usage and print time. By adjusting the infill density and pattern, we can find the perfect balance between strength and efficiency.
- 4. Another crucial step in optimizing our 3D printing designs is to minimize supports. Supports are necessary for printing overhanging features, but they can be time-consuming to remove and may leave scars on the surface of our print. By redesigning our model to reduce overhanging features, we can minimize the need for supports and result in a cleaner, more efficient print.
- 5. To further optimize our designs, we need to pay attention to wall thickness. A wall that is too thin can result in a weak print, while a wall that is too thick can be wasteful of material and increase print time. By ensuring that our wall thickness is consistent and optimal, we can achieve a strong and efficient print.
- 6. Now, let’s consider the role of bridging in our 3D printing designs. Bridging refers to the process of printing over open spaces, and it can be challenging to achieve successfully. By using bridging techniques such as increasing the bridge width or using a bridging infill pattern, we can improve the quality of our prints and reduce the likelihood of failures.
- 7. Finally, it’s essential to test and iterate our designs to ensure that they are optimized for 3D printing. By printing test models and analyzing the results, we can identify areas for improvement and make adjustments to our design to achieve the best possible outcome. This process of trial and error is crucial in optimizing our 3D printing designs and achieving high-quality prints.
Navigate Optimize 3d Printing Designs
As I delve into the world of 3D printing, I’m reminded of the intricate miniature dioramas I’ve built, where every detail matters. When it comes to reducing 3D print material waste, it’s essential to consider the design’s geometry and structure. By using 3D printing design software, creators can simulate and analyze their designs before printing, identifying potential areas of excess material.
In my experience, designing for 3D print orientation is crucial for achieving a smooth surface finish. By orienting the design in a way that minimizes support material, creators can reduce the risk of improving 3D print surface finish issues. This requires a deep understanding of the printing process and the material being used. I recall a particularly challenging project where I had to experiment with different orientations to achieve the desired result.
By applying techniques such as STL file optimization, designers can refine their designs for efficient printing. This involves analyzing the design’s mesh and adjusting it to reduce complexity while maintaining its integrity. As someone who’s passionate about storytelling, I believe that 3D model slicing strategies can be seen as a form of narrative, where each layer builds upon the last to create a cohesive and functional whole.
Charting Stl File Optimization
As I delve into the realm of STL file optimization, I’m reminded of the intricate miniature dioramas I’ve built, where every detail counts. Similarly, in 3D printing, a well-optimized STL file can make all the difference. It’s about striking a balance between detail and simplicity, ensuring a smooth printing process. I recall the stories of sailors who navigated through treacherous waters, adapting to the ever-changing tides – much like we must adapt our designs to the capabilities of our 3D printers.
By carefully refining our STL files, we can avoid common pitfalls like excessive complexity or inadequate support structures. My trusty compass, passed down from my grandfather, serves as a reminder to always stay oriented and focused on the task at hand. As we chart this course, we’ll explore the tools and techniques necessary to optimize our STL files, setting us up for success in the world of 3D printing.
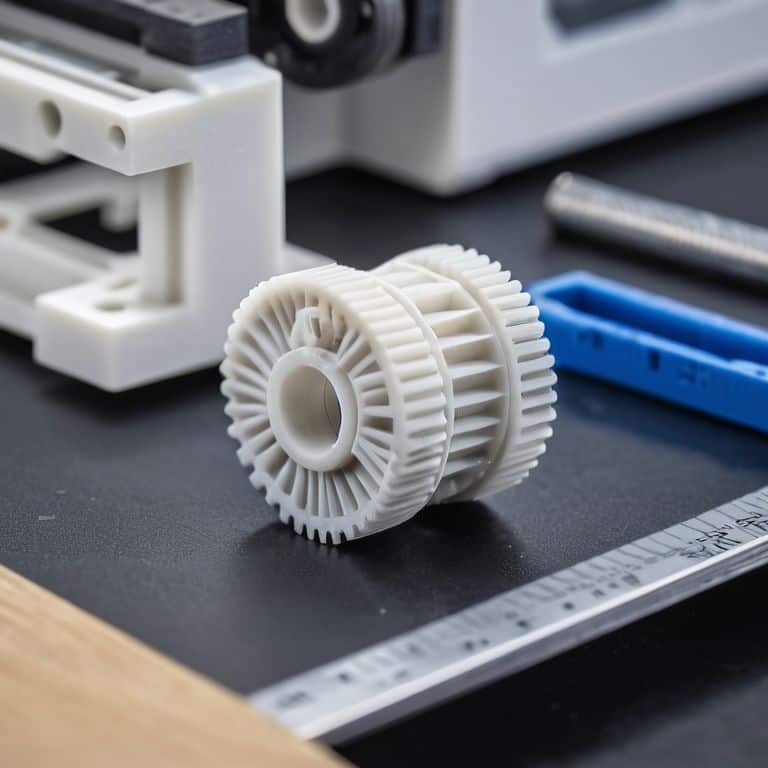
Designing for Material Waste Reduction
As I sit at my workbench, surrounded by the intricate miniature dioramas that have become my trademark, I’m reminded of the delicate balance between form and function. In 3D printing, this balance is crucial when designing for material waste reduction. By carefully planning the layout and orientation of our prints, we can significantly minimize excess material. It’s a bit like charting a course through treacherous waters – we must be mindful of every twist and turn to avoid unnecessary waste.
I recall a particularly challenging project, a miniature replica of the Eiffel Tower, where I had to meticulously adjust the print settings to reduce material usage. By doing so, I not only saved resources but also enhanced the overall appearance of the piece. This experience taught me the value of thoughtful design in 3D printing, and I’ve since applied this principle to all my projects, including my beloved dioramas.
Navigating the Horizon: 5 Key Tips to Optimize Your 3D Printing Designs
- Embrace the Art of Simplification: Reduce complexity by minimizing the number of individual parts and avoiding unnecessary details to ensure a smoother printing process
- Set Sail for Scale: Understand the importance of scale in your designs, ensuring that the model is proportionate and optimized for the chosen printing material and technology
- Chart a Course for Material Efficiency: Design with material waste reduction in mind, using techniques such as hollowing and lattice structures to minimize the amount of material used without compromising the structural integrity
- Discover the Power of Parametric Design: Leverage parametric modeling tools to create designs that can be easily modified and optimized based on specific printing requirements and material properties
- Explore the Uncharted Waters of Post-Processing: Don’t underestimate the impact of post-processing techniques on the final quality of your prints; experiment with different methods to enhance the surface finish, durability, and overall appearance of your creations
Key Takeaways for Optimizing 3D Printing Designs
As we conclude our journey through the realm of 3D printing design optimization, remember that a well-crafted digital model is akin to a meticulously planned voyage – every detail matters, from the choice of materials to the precision of the design’s intricate details.
By embracing the principles of STL file optimization and designing with material waste reduction in mind, you’ll not only enhance the efficiency of your 3D printing process but also contribute to a more sustainable practice, much like a sailor navigating through treacherous waters with the aid of a reliable compass.
Ultimately, the art of optimizing 3D printing designs is a continuous exploration, much like my own travels to the world’s most fascinating destinations – it requires patience, curiosity, and a willingness to experiment and learn from the uncharted territories of innovation, where the intersection of technology and creativity knows no bounds.
Optimization Odyssey
As we navigate the vast expanse of 3D printing possibilities, remember that optimizing designs is not just about refining lines of code, but about crafting a symphony of form and function that brings innovation to life.
Steven Wells
Embracing the Art of Optimization
As we conclude our journey through the realm of 3D printing design optimization, it’s essential to reflect on the key takeaways. We’ve navigated the importance of STL file optimization, learned techniques for designing with material waste reduction in mind, and explored the intricacies of navigating optimize 3D printing designs. By applying these principles, you’ll be well on your way to creating more efficient, cost-effective, and environmentally friendly designs. Remember, the devil is in the details, and it’s the small adjustments that can make a significant impact on the overall quality and sustainability of your 3D printing projects.
As you set sail into the world of 3D printing, keep in mind that optimization is a continuous process. It’s a journey of discovery, where each new project presents an opportunity to refine your skills and push the boundaries of what’s possible. By embracing this mindset, you’ll not only improve your designs but also contribute to a more sustainable and innovative 3D printing community. So, go forth and create, always seeking to improve and inspire others with your work, and remember that the true art of optimization lies in the pursuit of perfection, not the destination itself.
Frequently Asked Questions
What are the most common mistakes to avoid when optimizing 3D printing designs for beginners?
As a wanderer in the realm of 3D printing, I’ve found that beginners often stumble upon the rocks of insufficient support structures, inadequate layer thickness, and neglecting to account for material limitations, leading to prints that are as fragile as a sandcastle in a storm.
How can I balance the trade-off between design complexity and printing time in 3D printing?
As I ponder the delicate balance between design complexity and printing time, I’m reminded of the intricate miniature dioramas I craft – each detail a trade-off between beauty and brevity. To navigate this trade-off, consider prioritizing essential features, simplifying geometries, and leveraging slicing software to optimize print settings, thus finding a harmony that suits your creative vision.
What are some popular software tools for analyzing and optimizing 3D printing designs, and how do they compare?
As I delve into the world of 3D printing, I’ve discovered a treasure trove of software tools that help analyze and optimize designs. Popular ones include Tinkercad, Fusion 360, and Simplify3D, each with its unique strengths in terms of complexity, precision, and user-friendliness.