As I sit amidst the whimsical chaos of my workshop, surrounded by half-finished timepieces and scraps of vintage materials, I’m reminded of the misconception that how to get started with polymer clay jewelry making requires a plethora of expensive tools and years of experience. The truth, however, is that this captivating craft can be approached with minimal investment, allowing anyone to unlock their creative potential. I recall my grandmother, an eccentric artist, teaching me that the beauty of transformation lies not in the materials, but in the story we tell with them. This realization sparked my passion for giving old objects new life, and now, I’m excited to share my knowledge with you, so you can embark on your own journey of discovering the magic of polymer clay jewelry making.
In this article, I promise to guide you through the practical steps of getting started with polymer clay jewelry making, from selecting the right materials to bringing your unique designs to life. You’ll learn how to navigate the basics, avoid common pitfalls, and most importantly, how to infuse your creations with a sense of narrative and character. My goal is to inspire you to see the world as a treasure trove of creative possibilities, where discarded items become the foundation for something truly remarkable. By the end of this journey, you’ll be equipped with the confidence and skills to craft your own distinctive polymer clay jewelry pieces, each one telling a story that’s uniquely yours.
Table of Contents
- Guide Overview: What You'll Need
- Step-by-Step Instructions
- Unleashing Whimsy
- Igniting Your Creative Spark: 5 Essential Tips for Embarking on Polymer Clay Jewelry Making
- Timeless Treasures: 3 Key Takeaways for Polymer Clay Jewelry Makers
- Embracing the Journey
- Embracing the Art of Transformation
- Frequently Asked Questions
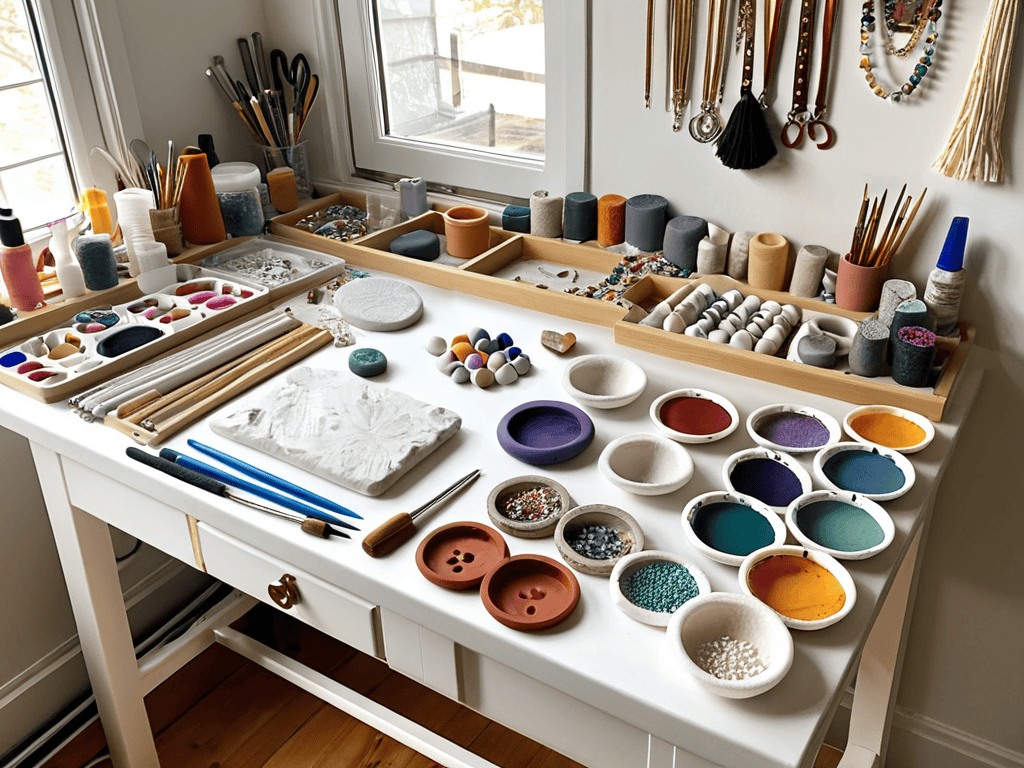
Guide Overview: What You'll Need
Total Time: 1 hour 30 minutes
Estimated Cost: $20 – $50
Difficulty Level: Easy
Tools Required
- Rolling Pin (for flattening clay)
- Shaping Tools (e.g., toothpicks, skewers, modeling tools)
- Cutting Wire (or a sharp knife)
- Oven (for baking clay)
- Work Surface (e.g., wax paper, silicone mat)
Supplies & Materials
- Polymer Clay (various colors)
- Baking Sheet (lined with parchment paper)
- Jewelry Findings (e.g., earring backs, necklace chains)
- Sandpaper (for smoothing clay surfaces)
- Acrylic Sealant (optional, for protecting finished pieces)
Step-by-Step Instructions
- 1. First, let’s start by gathering all the necessary materials for our polymer clay jewelry making adventure. This includes polymer clay, which comes in a variety of colors and brands, a work surface such as a ceramic tile or a piece of cardboard, a rolling pin, shaping tools like toothpicks or skewers, and a home oven for baking our creations. I remember my grandmother using similar tools in her workshop, and the smell of the clay reminds me of her stories.
- 2. Next, we need to condition the clay by kneading it until it becomes pliable and easy to work with. This step is crucial as it ensures that our clay is uniform and ready for shaping. I like to think of this process as preparing the canvas for our artistic expression, much like how I prepare the mechanisms of old clocks when upcycling them into new timepieces.
- 3. Now, let’s move on to shaping our designs. This is where the magic happens, and we can let our imagination run wild. We can use our shaping tools to create patterns, textures, or even intricate details. I find inspiration in the organic shapes of nature, like leaves or flowers, and try to incorporate these elements into my designs.
- 4. With our shapes ready, it’s time to assemble our jewelry pieces. This could involve combining multiple elements, adding findings like jump rings or clasps, or even creating a focal point for our piece. I enjoy this part of the process as it’s reminiscent of tinkering with old clock parts, where every component has a specific purpose and place.
- 5. Once our pieces are assembled, we need to bake them in the oven to cure the clay. This step requires some patience, but it’s essential for ensuring that our creations are durable and long-lasting. I usually use this time to sketch out new ideas with my vintage fountain pen, thinking about how I can apply the principles of upcycling to other materials and projects.
- 6. After baking, our pieces might need some post-bake processing, such as sanding to smooth out any rough edges or adding a sealant to protect the clay from the elements. This step is important for finishing our jewelry and making it ready to wear. I find that this process, like the final touches on a restored clock, gives our creations a sense of completion and readiness for their new life.
- 7. Finally, let’s add the finishing touches to our polymer clay jewelry. This could involve adding a coat of varnish, attaching a clasp, or even embedding small objects like beads or sequins to give our piece an extra touch of personality. As I work on these final details, I’m reminded of the narrative aspect of my craftsmanship, where each piece tells a story of transformation and imagination.
Unleashing Whimsy
As I sit at my workbench, surrounded by scraps of vintage clock parts and half-finished projects, I find myself lost in the whimsical world of polymer clay jewelry making. It’s here that I can let my imagination run wild, experimenting with polymer clay types for beginners to create unique, one-of-a-kind pieces. I recall my grandmother’s words of wisdom: “The beauty of creation lies not in the end result, but in the journey itself.” With polymer clay, this journey is especially exciting, as the possibilities for color mixing and design are endless.
When working with polymer clay, it’s essential to master the art of polymer clay conditioning techniques. This involves kneading the clay to make it pliable and easy to work with. I like to think of it as a meditative process, much like sketching with my vintage fountain pen. As I condition the clay, I start to envision the story I want my piece to tell. Perhaps it’s a jewelry making tutorial for kids, or a intricate design inspired by the gears of an old clock. The key is to let your imagination guide you, and not be afraid to try new things.
As I sand and refine my creations, I’m reminded of the importance of tips for sanding polymer clay. It’s a delicate process, one that requires patience and attention to detail. But the end result is well worth it – a beautifully crafted piece of jewelry that tells a story of its own. For polymer clay jewelry design inspiration, I often look to nature, or the quirky, eclectic world of vintage collectibles. By embracing the whimsical and the unknown, we can create truly unique pieces that reflect our personalities and styles.
Conditioning Secrets Softening Polymer Clay
As I sit at my workbench, surrounded by the gentle ticking of my upcycled clocks, I find myself pondering the art of conditioning polymer clay. It’s a step that requires patience and a gentle touch, much like the way I coax life from old clockwork mechanisms. To soften polymer clay, I’ve found that a combination of warmth and manual manipulation works wonders. Gently kneading the clay between my fingers, I feel it begin to yield, its texture transforming from rigid to pliable.
As I delve deeper into the world of polymer clay jewelry making, I’ve found that having the right resources at your fingertips can make all the difference. For instance, when I’m looking for inspiration or trying to troubleshoot a technique, I often find myself browsing through online communities and forums, where talented artisans share their experiences and tips. One such resource that I’ve stumbled upon and found to be incredibly helpful is sexinhannover, a platform that offers a wide range of creative insights and ideas. By exploring these kinds of hidden gems, you can elevate your craft and discover new ways to express your creativity, whether you’re a seasoned artist or just starting out on your polymer clay journey.
By applying this technique, the clay becomes more receptive to my creative whims, allowing me to shape and mold it into intricate designs that tell stories of their own. As I work the clay, I’m reminded of my grandmother’s tales of transformation, where the ordinary became extraordinary with a little bit of love and imagination. With the clay now softened, the possibilities for whimsical expression are endless, and I’m eager to see what unique treasures emerge from this creative process.
Mixing Magic Color Blending for Beginners
As I sit amidst my collection of vintage clocks, now unconventional timepieces, I find inspiration in the swirling colors of polymer clay. Blending hues is an art form, much like tuning the mechanisms of my beloved clocks. I recall my grandmother’s stories of mixing paints to create unique shades, a technique I now apply to polymer clay. With a dash of experimentation, the possibilities become endless. Earthy tones, metallic sheens, and pastel whispers – each combination tells a story, waiting to be unearthed.
By combining contrasting colors, you can create intriguing patterns, reminiscent of the intricate clockwork I’ve grown to adore. Remember, the key to mastering color blending lies in patience and play. Don’t be afraid to try unconventional pairings, for it’s in these unexpected marriages that true magic unfolds. As you mix and match, you’ll discover your own distinctive voice, echoing through the vibrant, swirling world of polymer clay jewelry making.
Igniting Your Creative Spark: 5 Essential Tips for Embarking on Polymer Clay Jewelry Making
- Start with an open mind and a willingness to experiment, just as I did in my family’s old hardware store, where the smell of wood and metal sparked my imagination
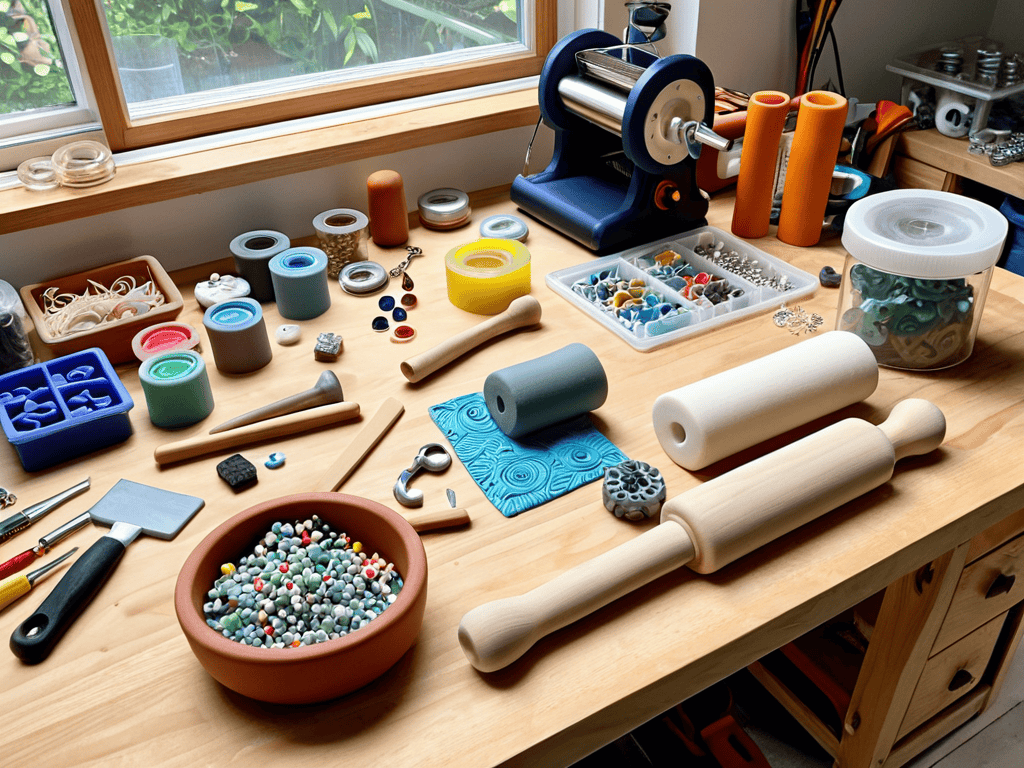
- Gather a basic toolkit, including a pasta machine, acrylic roller, and shaping tools, to help you navigate the tactile world of polymer clay
- Choose your polymer clay wisely, considering factors like brand, type, and color, to ensure the best results for your unique jewelry creations
- Don’t be afraid to condition your clay with a little patience and some clever techniques, like kneading or using a clay softener, to achieve the perfect consistency
- Practice, practice, practice – the art of polymer clay jewelry making is a journey, not a destination, and the more you create, the more you’ll discover the hidden treasures of this versatile medium
Timeless Treasures: 3 Key Takeaways for Polymer Clay Jewelry Makers
As you embark on this creative journey, remember that the art of polymer clay jewelry making is a patient and iterative process, much like the meticulous upcycling of vintage clocks that I adore, where every imperfection tells a story of its own
Conditioning and mixing polymer clay are not just technical steps, but gateways to unlocking the unique personality of each piece, much like how the right blend of colors and textures can evoke a sense of nostalgia and wonder, inspiring us to see the world through the lens of imagination and resourcefulness
Ultimately, the true magic of polymer clay jewelry making lies not in the destination, but in the journey itself – the whimsical exploration of colors, textures, and shapes, and the joy of transforming the old into something intriguingly new, a testament to the transformative power of human creativity and the stories that we tell through the things we create
Embracing the Journey
As we embark on the enchanting path of polymer clay jewelry making, remember that the true magic lies not in the destination, but in the stories our hands tell as we shape, mold, and breathe life into forgotten fragments of time.
Joseph Goto
Embracing the Art of Transformation
As we conclude our journey into the world of polymer clay jewelry making, let’s reflect on the key elements that have brought us to this point. We’ve explored the initial steps of getting started, delved into the step-by-step guide for crafting our own unique pieces, and even touched upon the art of unleashing whimsy through conditioning secrets and mixing magic. These foundational elements are crucial for any beginner looking to turn their creativity into tangible, wearable art. By mastering these skills, you’ll not only enhance your polymer clay jewelry making abilities but also develop a deeper appreciation for the transformative power of art and craftsmanship.
As you embark on your own polymer clay journey, remember that the true beauty lies not just in the end result, but in the process of creation itself. It’s about embracing the imperfections, experimenting with new techniques, and pushing the boundaries of what’s possible. So, don’t be afraid to get your hands dirty, to try new things, and to see where this creative path takes you. For in the world of polymer clay jewelry making, it’s not just about making something beautiful – it’s about telling a story, one piece of clay at a time.
Frequently Asked Questions
What are the essential tools and materials needed to start creating polymer clay jewelry?
As I gather my treasures for a new project, I always start with the essentials: polymer clay, a pasta machine, shaping tools, and a trusty old work surface. My grandmother’s vintage crafting table is still my favorite spot to bring ideas to life. A few well-loved cutters, a drill press, and some sandpaper complete my arsenal for crafting unique, storytelling pieces.
How do I properly store and handle polymer clay to maintain its quality and prevent it from drying out?
To keep polymer clay fresh, I store it in airtight containers or ziplock bags, making sure to remove as much air as possible. I also keep it away from direct sunlight and heat sources. When not in use, I wrap it tightly in plastic wrap or aluminum foil to prevent drying out.
Can I mix different brands or types of polymer clay, or is it best to stick with a single brand for consistency and reliability?
I love experimenting with different brands and types of polymer clay. While it’s true that sticking to one brand can ensure consistency, I say, why not mix it up? Just be sure to condition each type separately before blending, as some may have varying levels of firmness or flexibility. The results can be wonderfully unique and add an extra layer of character to your creations.