As I sit amidst the nostalgic charm of my family’s old hardware store, surrounded by the gentle tick-tock of my upcycled vintage clocks, I’m reminded that DIY Robotics is more than just a hobby – it’s a chance to breathe new life into forgotten materials and weave a tale of innovation and tradition. I’ve often found that people believe DIY robotics is a complex, unapproachable field, but I’m here to tell you that with the right mindset and tools, anyone can dive into this fascinating world. My own journey with DIY robotics began with a simple curiosity about how things work, and it’s led me to create some truly unique pieces that blend the past with the present.
In this article, I promise to share practical advice and honest insights gained from my own experiences with DIY robotics. You won’t find any overly technical jargon or unrealistic projects here; instead, I’ll guide you through the process of creating your own DIY robotics projects, from conceptualization to completion. Whether you’re a seasoned tinkerer or just starting out, my goal is to inspire you to see the potential in everyday objects and to give you the confidence to start building your own DIY robotics creations. So, let’s get started on this journey of discovery and creativity, and uncover the forgotten beauty of DIY robotics together.
Table of Contents
- Guide Overview: What You'll Need
- Step-by-Step Instructions
- Reviving Whispers in Diy Robotics
- Tinkering Tales: 5 Essential Tips for Embarking on a DIY Robotics Journey
- Key Takeaways from My DIY Robotics Journey
- Embracing the Beauty of DIY Robotics
- Embracing the Beauty of DIY Robotics
- Frequently Asked Questions
Guide Overview: What You'll Need
Total Time: 5 hours 30 minutes
Estimated Cost: $100 – $200
Difficulty Level: Intermediate
Tools Required
- Microcontroller such as Arduino or Raspberry Pi
- Breadboard for prototyping and testing
- Jumper Wires assorted colors and lengths
- Soldering Iron with temperature control
- Wire Strippers for 22-gauge wire
- Pliers needle-nose for gripping small components
- Screwdrivers flathead and Phillips
Supplies & Materials
- Robotics Kit including motors, gears, and chassis
- Sensors such as ultrasonic or infrared
- Power Source batteries or a wall adapter
- Wood or Plastic for building a robot body, 1/4 inch thick
- Fasteners such as screws, nuts, and bolts
- Electrical Tape for insulating wires
- Circuit Board for mounting components
Step-by-Step Instructions
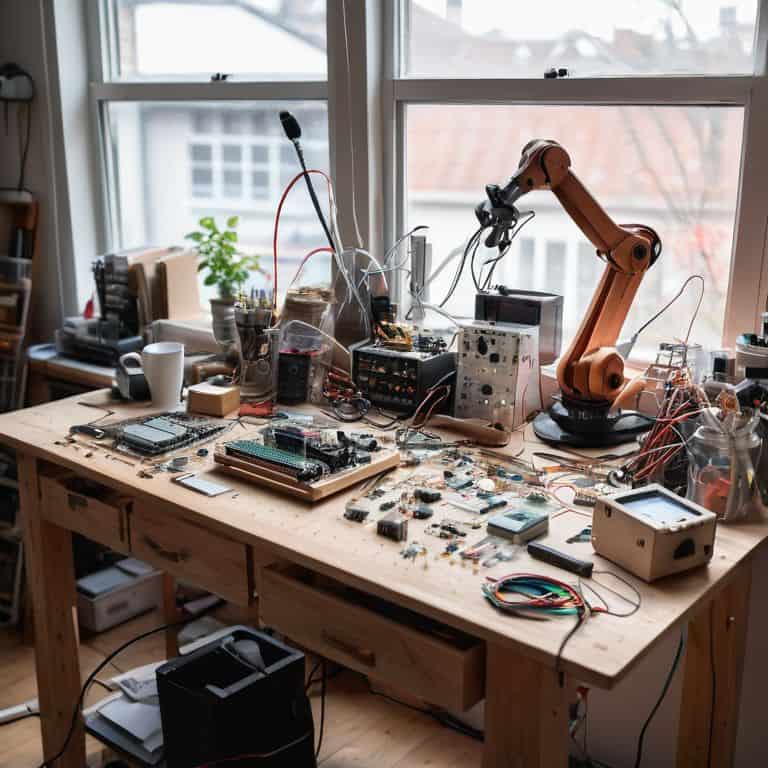
- 1. To begin our journey into DIY robotics, we first need to gather our materials, which include an assortment of vintage clock parts, microcontrollers, wires, and a plethora of scrap metals and woods to create the body of our robotic timekeeper. I find that scavenging for parts in old hardware stores and flea markets not only adds a layer of nostalgia to our project but also encourages creativity in repurposing items.
- 2. Next, we need to design the blueprint of our robotic creature. Using my trusty vintage fountain pen, I sketch out ideas, considering both form and function. This stage is crucial as it sets the foundation for our project’s narrative, blending the lines between art and technology. I often find inspiration in steampunk aesthetics, combining Victorian-era sensibilities with science fiction elements.
- 3. With our design in hand, it’s time to bring our robot to life. This involves assembling the microcontroller, programming it, and integrating the vintage clock parts into a cohesive system. I prefer to use Arduino boards for their ease of use and versatility, allowing for a wide range of customization and expansion. The process of coding and debugging is where the magic happens, as our static parts begin to interact and function as a singular entity.
- 4. Now, we move on to the physical construction of our robot, which involves welding, soldering, and woodworking. This is the stage where our sketches become three-dimensional, and the character of our robot starts to emerge. I enjoy upcycling vintage materials not just for their environmental benefits but also for the stories they tell and the character they add to our final product.
- 5. Once the body of our robot is constructed, we can proceed to integrate the electronics. This step requires patience and precision, as we carefully connect wires, solder components, and ensure that all parts are securely in place. Troubleshooting is an essential skill here, as even the smallest mistake can lead to significant issues down the line.
- 6. The programming phase is where we define the behaviors and actions of our robot. Depending on our design, this could involve anything from simple movements to complex interactions with its environment. I find that experimenting with different algorithms can lead to fascinating and sometimes unexpected behaviors, adding a layer of artificial intelligence to our creation.
- 7. Finally, we test and refine our robot, ensuring that all components work in harmony. This stage is about fine-tuning our creation, making adjustments as necessary, and sometimes discovering new features or possibilities we hadn’t considered initially. The moment when our robot first springs to life, whirring and ticking away, is truly magical, a culmination of our hard work and creativity.
Reviving Whispers in Diy Robotics
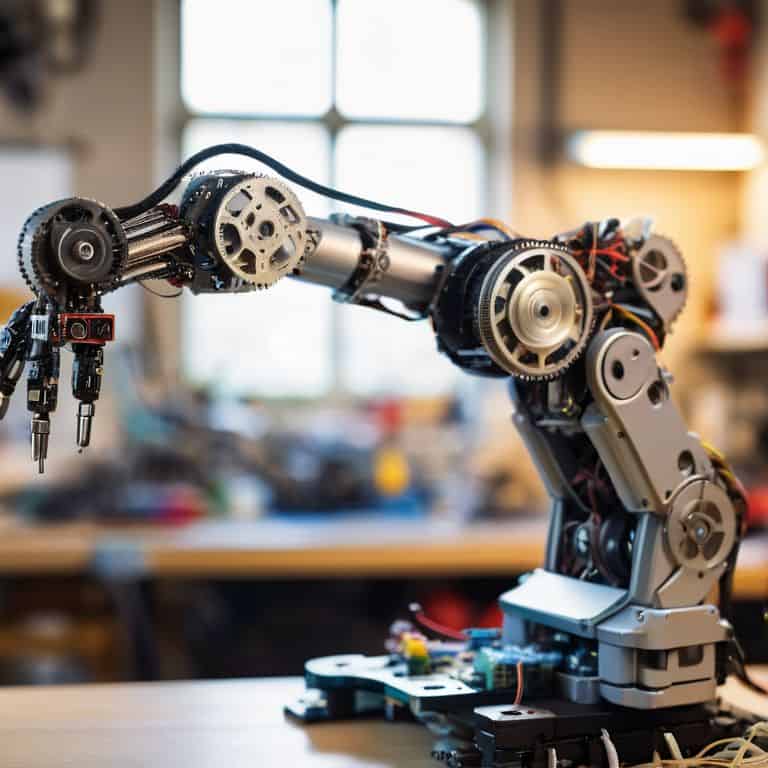
As I delve into the world of DIY robotics, I find myself drawn to the intricacies of robotic arm design tutorials, where precision and creativity intertwine. It’s fascinating to see how a well-designed robotic arm can breathe new life into a project, much like the ticking heartbeat of my upcycled vintage clocks. By exploring arduino robot projects, I’ve discovered the beauty of simplicity in robotics, where a few cleverly chosen components can lead to a multitude of innovative applications.
When it comes to bringing these robotic creations to life, sensor integration for robots plays a vital role. It’s remarkable how sensors can elevate a project from a static entity to a dynamic, interactive being. I’ve found that affordable robotic platforms have made it possible for anyone to experiment with robotics, regardless of their budget or experience level. This democratization of robotics has opened doors to a new generation of makers and inventors.
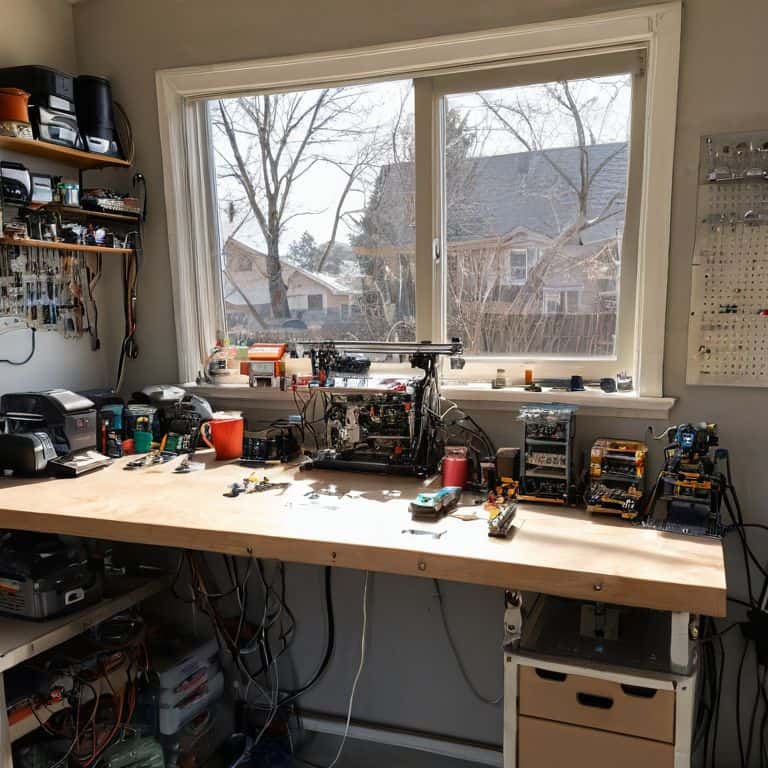
In my own workshop, I’ve been experimenting with robot programming languages, seeking to push the boundaries of what’s possible with DIY robotics. The process is akin to sketching with my vintage fountain pen – each line, each stroke, holds the potential for a new story, a new creation. As I work, I’m reminded that the true magic of robotics lies not in the technology itself, but in the possibilities it unlocks, waiting to be discovered by curious minds and creative hands.
Breathing Life Into Arduino Robot Projects
As I delve into Arduino robot projects, I’m captivated by the potential to merge vintage charm with modern innovation. By repurposing old clock mechanisms, I’ve created unique robotic creatures that not only tell time but also tell a story. The soft tick-tock of gears, the gentle whir of motors, and the faint glow of LEDs all come together to breathe life into these mechanical beings. With each project, I feel like I’m uncovering a hidden narrative, one that speaks to the beauty of transformation and the magic of giving old materials new purpose.
In my workshop, surrounded by sketches and half-finished projects, I find inspiration in the intersection of past and present. My vintage fountain pen glides across the paper, bringing ideas to life as I design and refine my Arduino creations. The process is meditative, a symphony of art and technology that whispers tales of what could be. As I work, I’m reminded that the true beauty of DIY robotics lies not just in the end result, but in the journey itself – a journey of discovery, creativity, and the joy of bringing forgotten whispers back to life.
Unveiling Raspberry Pi Robotic Kits
As I delve into the world of DIY robotics, I find myself enchanted by the versatility of Raspberry Pi robotic kits. These compact powerhouses offer a gateway to innovation, allowing me to craft unique stories with each project. With a vintage fountain pen in hand, I sketch out ideas, feeling the connection to the past as I bring forth new creations. The Raspberry Pi’s adaptability is a testament to the magic that unfolds when old and new converge.
I’ve had the pleasure of upcycling vintage clocks into unconventional timepieces, and I see similar potential in Raspberry Pi kits. By combining these modern tools with forgotten materials, I aim to create something truly remarkable – a blend of nostalgia and cutting-edge technology that whispers tales of the past while embracing the future.
Tinkering Tales: 5 Essential Tips for Embarking on a DIY Robotics Journey
- Start with a story, not a schematic: Before diving into the technical aspects, consider the narrative you want your DIY robot to tell – what era does it evoke, what materials will you use, and how will it interact with its environment?
- Choose your canvas: Select a base material or platform that resonates with your project’s theme, whether it’s a vintage radio, a wooden crate, or a reclaimed metal sheet, to serve as the foundation for your robotic creation
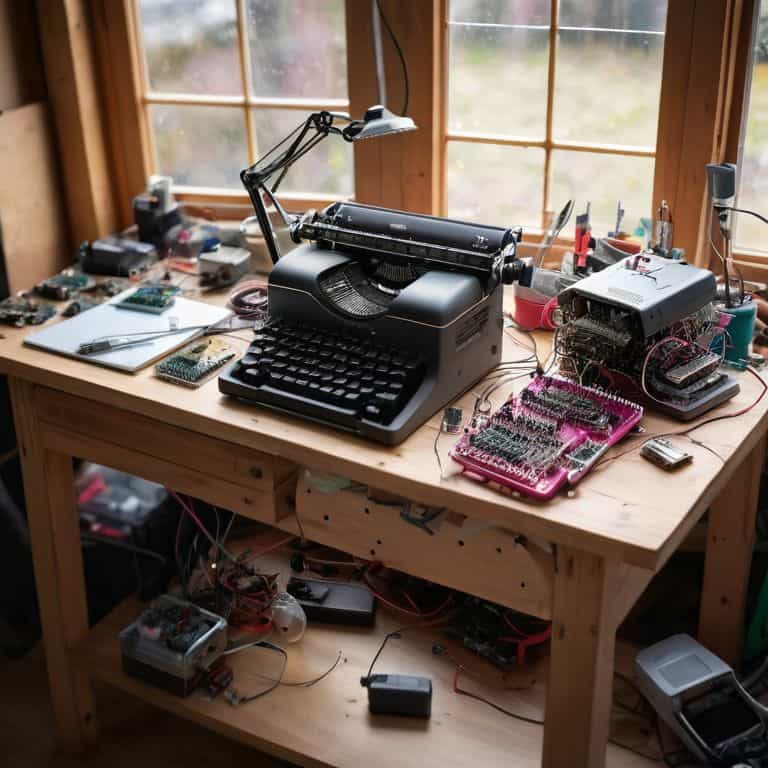
- Reimagine, reuse, recycle: Scour thrift stores, estate sales, and your own attic for hidden gems – old clock parts, typewriter keys, or camera lenses – to incorporate into your design, giving your robot a unique character and history
- Experiment with unconventional interfaces: Move beyond traditional buttons and screens by incorporating vintage knobs, antique switches, or even a restored typewriter keyboard to control your robot’s functions and create an immersive experience
- Join the conversation, not the instruction manual: Share your process, your setbacks, and your triumphs with the DIY community to foster a sense of collaboration and inspiration, and to learn from the collective knowledge and creativity of fellow makers
Key Takeaways from My DIY Robotics Journey
I’ve learned that the true beauty of DIY robotics lies not just in the technology itself, but in the stories and memories we can weave into each project, giving new life to forgotten materials and ideas
Through experimenting with Arduino and Raspberry Pi, I’ve discovered that these platforms offer a unique gateway to combining traditional craftsmanship with modern innovation, allowing us to create truly unique and functional pieces
Perhaps most importantly, my adventures in DIY robotics have taught me that the process of creation is just as valuable as the end result, encouraging a mindset of inventive nostalgia that seeks to bridge the past and the present through hands-on, creative projects
Embracing the Beauty of DIY Robotics
In the realm of DIY robotics, it’s not just about coding and circuits, but about uncovering the hidden narratives of forgotten materials and breathing life into the intersection of tradition and innovation.
Joseph Goto
Embracing the Beauty of DIY Robotics
As I reflect on our journey through the world of DIY robotics, I’m reminded of the transformative power of giving old materials new life. From the whispers of forgotten hardware to the vibrant hum of an Arduino robot, each project is a testament to the human spirit’s capacity for innovation and creativity. Whether you’ve delved into the realm of Raspberry Pi robotic kits or preferred the more traditional approach of breathing life into discarded parts, the core of DIY robotics remains the same: a passion for storytelling through hands-on creation. This narrative tinkerer’s approach not only bridges the gap between past and present but also inspires a sense of community and shared imagination among its practitioners.
As we conclude this exploration of DIY robotics, let’s hold onto the essence of creative experimentation that drives us. Remember, the true beauty of DIY robotics lies not just in the end product, but in the journey of discovery itself. So, let’s continue to tinker, to invent, and to tell our stories through the unique language of DIY robotics, inspiring others to join us in this captivating world where technology meets nostalgia, and innovation knows no bounds.
Frequently Asked Questions
What are some essential tools and materials needed to get started with DIY robotics projects?
To embark on a DIY robotics journey, I always start by gathering essentials like a soldering iron, jumper wires, and a trusty multimeter. For projects, I rely on microcontrollers like Arduino or Raspberry Pi, along with motors, sensors, and a variety of recycled materials from my hardware store days.
How can I integrate vintage components, like old clock parts, into my DIY robot designs to give them a unique aesthetic?
To infuse your DIY robots with a unique charm, consider repurposing vintage clock parts. I’ve found that incorporating old gears, pendulums, or clock faces can add a captivating narrative to your designs. For instance, you could use a vintage clock’s mechanical components to create a robot’s limb or integrate a clock face as a decorative element, blending the past with innovative robotics.
What are some beginner-friendly DIY robotics kits that can help me develop my skills in programming and electronics?
For a beginner, I recommend starting with kits like Makeblock’s mBot or the Sphero Mini, which offer a gentle learning curve and exciting projects to get you started with programming and electronics. These kits are perfect for sparking creativity and building foundational skills in DIY robotics.