As I sit amidst the nostalgic trinkets of my family’s old hardware store, surrounded by the gentle tick-tock of my upcycled vintage clocks, I’m reminded that Arduino for beginners doesn’t have to be a daunting journey. In fact, I’ve found that the most beautiful projects often stem from the simplest, most curiosity-driven beginnings. It’s a common myth that one needs to be well-versed in coding or electronics to dive into the world of Arduino, but I’m here to tell you that’s just not true. With a willingness to learn and a bit of creativity, anyone can bring their ideas to life.
In this article, I promise to guide you through the fundamentals of Arduino with honest, no-hype advice, sharing my own experiences and tips for getting started. You’ll learn how to choose the right materials, set up your workspace, and bring your first project to life. My goal is to inspire you to see the potential in this incredible platform, and to empower you to create something truly unique. Whether you’re a seasoned tinkerer or just starting out, I invite you to join me on this journey into the world of Arduino for beginners, where the boundaries of innovation are waiting to be pushed.
Table of Contents
Guide Overview: What You'll Need
Total Time: 2 hours 30 minutes
Estimated Cost: $50 – $100
Difficulty Level: Easy
Tools Required
- Computer (with internet connection)
- USB Cable (for Arduino connection)
- Breadboard (for circuit building)
- Jumper Wires (assorted colors and lengths)
- Wire Cutters (for cutting jumper wires to size)
- Pliers (for gripping small components)
Supplies & Materials
- Arduino Board (e.g., Arduino Uno)
- LED Lights (for basic circuit projects)
- Resistors (assorted values)
- Push Buttons (for input projects)
- Sensors (e.g., temperature, light, or ultrasonic)
Step-by-Step Instructions
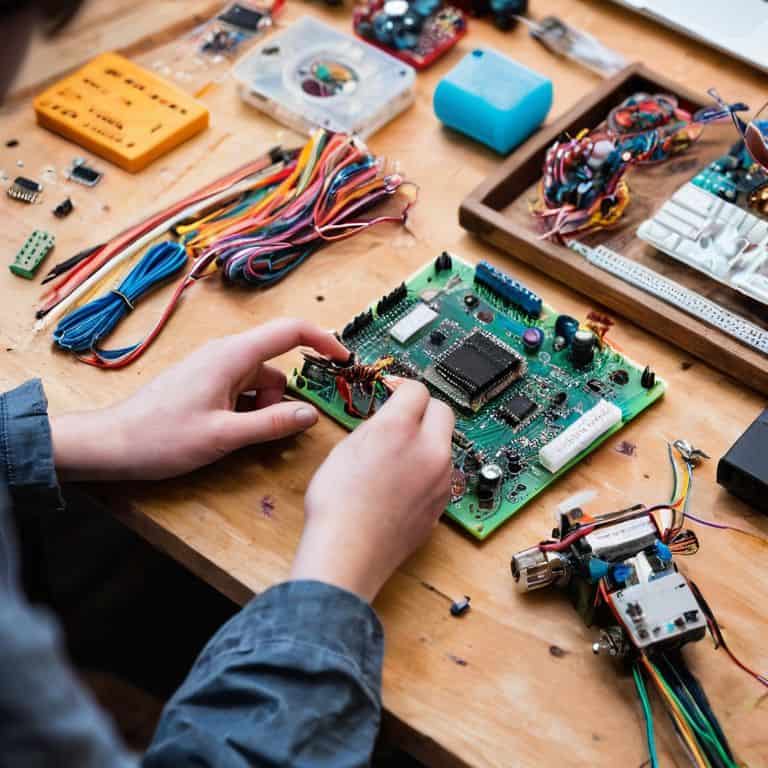
- 1. To begin our Arduino journey, we first need to acquaint ourselves with the basics of the platform. This involves understanding what Arduino is, its capabilities, and the variety of projects it can be used for. I find that starting with simple, intriguing projects helps to spark curiosity and motivation, much like my experience with upcycling vintage clocks, where the thrill of giving old components new life is incredibly fulfilling.
- 2. Next, we need to gather our tools and materials. This includes the Arduino board itself, a computer for programming, a USB cable for connecting the board to the computer, and any additional components required for our specific project, such as LEDs, buttons, or sensors. I always make sure to have a vintage fountain pen handy, not just for sketching out ideas, but as a reminder of the craftsmanship and storytelling that goes into each project.
- 3. Now, let’s install the necessary software. We’ll need to download and install the Arduino IDE (Integrated Development Environment) on our computer. This software allows us to write, edit, and upload our programs to the Arduino board. It’s also a good idea to explore the Arduino website for tutorials, examples, and documentation to get a deeper understanding of the platform and its endless possibilities.
- 4. With our software installed, it’s time to connect our Arduino board to the computer using the USB cable. This step is crucial as it not only powers the board but also enables communication between the board and the computer, allowing us to upload our programs. I often think back to my days in the family hardware store, where connecting old gadgets was a regular challenge, and how it fostered my problem-solving skills.
- 5. We’re now ready to write our first program. Open the Arduino IDE, and let’s start with a simple example, such as making an LED blink. This project introduces us to the basics of programming in Arduino, including setting up pins, using loops, and controlling outputs. As we write our code, it’s essential to remember that each line tells a part of the story of what our project will do, much like the mechanical heartbeat of my upcycled clocks.
- 6. After writing our program, the next step is to upload it to the Arduino board. Make sure the board is selected from the tools menu, and then click the upload button. The IDE will compile our code and send it to the board, where it will run immediately. This process always fills me with a sense of anticipation and excitement, similar to winding up one of my vintage clock creations and watching it spring to life.
- 7. Finally, we need to test and refine our project. With our LED blinking program uploaded, we can observe the results and make any necessary adjustments. This might involve changing the blink rate, adding more LEDs, or even incorporating other components like buttons or sensors to create a more interactive experience. As we refine our project, we’re not just troubleshooting code or circuits; we’re crafting a narrative of innovation and reuse, giving old ideas new life and functionality.
Arduino for Beginners
As I delve into the world of microcontrollers, I’m reminded of the countless hours I spent in my family’s hardware store, surrounded by peculiar gadgets and machinery. Getting started with Arduino programming can seem daunting, but it’s essential to approach it with a curious mindset. I recall my first project, a simple sensor-activated LED, which sparked a sense of wonder and excitement. It’s crucial to start with basic projects that allow you to grasp the fundamentals of Arduino, such as understanding the board components and building a simple Arduino robot.
When working on Arduino sensor projects for beginners, it’s vital to consider the components and their limitations. I’ve found that experimenting with different sensors and actuators can lead to fascinating discoveries. For instance, using a ultrasonic sensor to detect distance can be a great way to introduce yourself to the world of Arduino project ideas for hobbyists. By exploring various projects, you’ll develop a deeper understanding of the Arduino ecosystem and be better equipped to tackle more complex tasks.
As you progress, you’ll inevitably encounter issues that require Arduino troubleshooting common issues. Don’t be discouraged – these setbacks are an opportunity to learn and grow. I’ve found that the process of debugging and resolving problems is an essential part of the learning journey. By embracing the challenges and understanding Arduino serial communication, you’ll become more confident in your abilities and better equipped to bring your innovative ideas to life.
Troubleshooting Common Arduino Issues
As I delve into the world of Arduino, I’ve found that even the most seasoned tinkerers encounter hiccups along the way. Troubleshooting is an art that requires patience, persistence, and a willingness to learn from our mistakes. I recall spending hours in my family’s hardware store, fixing vintage clocks and learning to diagnose issues with a careful eye. This skill has served me well in my Arduino journey, where a single misplaced wire or incorrect code can bring a project to a grinding halt.
When faced with a malfunctioning circuit, I take a step back, revisit my sketches, and methodically work through each component. It’s amazing how often a simple oversight can be resolved with a fresh perspective. By embracing the process of trial and error, we can transform obstacles into opportunities for growth, and our creations become testaments to the power of perseverance and creative problem-solving.
Unraveling Arduino Board Secrets
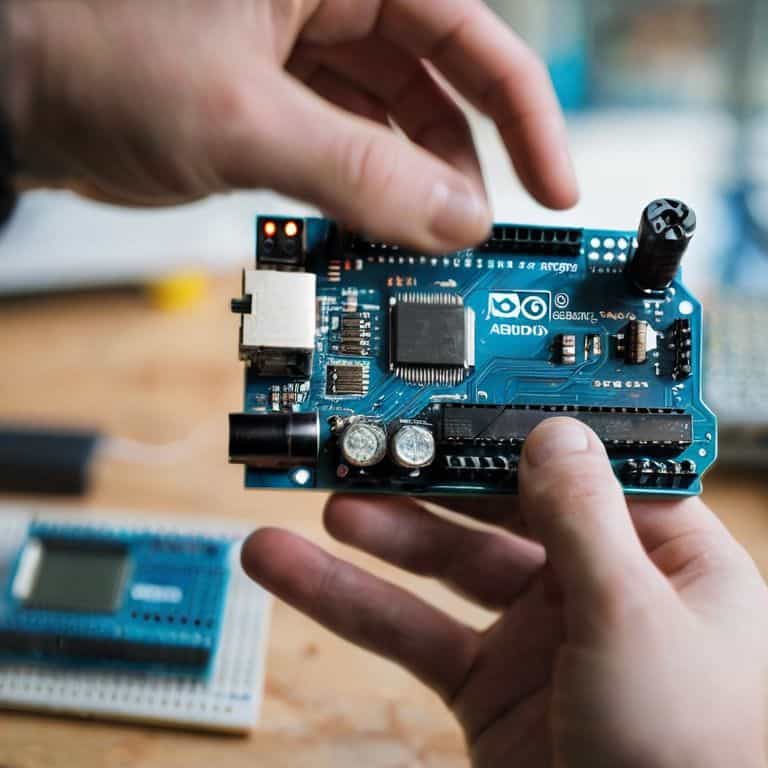
As I delve into the world of Arduino, I find myself enchanted by the intricate dance of circuits and components that bring these boards to life. The Arduino board, with its humble appearance, holds a wealth of secrets waiting to be unraveled by curious beginners. I recall spending hours in my family’s hardware store, fascinated by the way a simple solder could breathe new life into discarded devices. Similarly, understanding the Arduino board’s layout and functionality is key to unlocking its full potential. By exploring the board’s various ports, pins, and components, beginners can gain a deeper appreciation for the craftsmanship that goes into creating these tiny powerhouses.
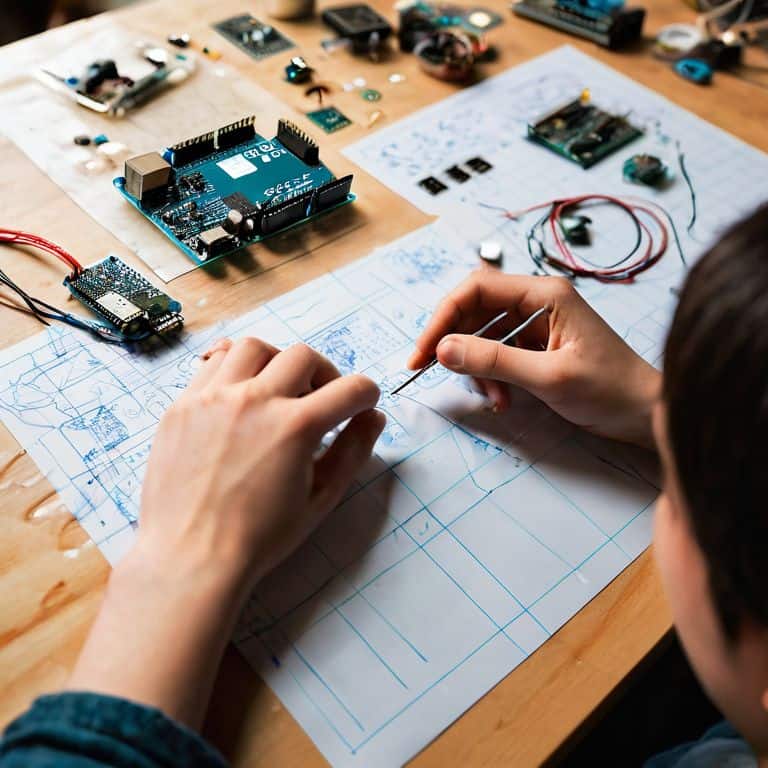
With my trusty vintage fountain pen in hand, I sketch out the board’s layout, noting the input/output pins, power pins, and communication ports. This tactile approach helps me connect with the board on a more intimate level, much like my grandmother taught me to see the world through the lens of imagination and resourcefulness. As I study the board’s secrets, I am reminded that the true beauty of Arduino lies not just in its functionality, but in the stories it tells of innovation and creativity.
Igniting the Spark: 5 Essential Tips for Arduino Newcomers
- Start with the basics: Begin your Arduino journey by understanding the fundamental components and how they interact, just as I did in my family’s hardware store, where curiosity and tinkering were always encouraged
- Choose the right board: With so many Arduino boards available, selecting the one that suits your project can be daunting, but remember, the best board for a beginner is one that balances ease of use with versatility, such as the Arduino Uno
- Learn to read and write code: Arduino programming is based on C++, and while it may seem intimidating at first, breaking it down into smaller, manageable parts and practicing regularly will make you proficient in no time, much like how my grandmother taught me to see stories in everyday objects
- Practice with simple projects: The best way to grasp Arduino is by doing, so start with simple projects like blinking LEDs or basic sensors, and gradually move on to more complex tasks, allowing you to build confidence and skills
- Join a community: The Arduino community is vast and supportive, filled with individuals who are passionate about sharing knowledge and helping newcomers, so don’t hesitate to reach out, share your projects, and learn from the experiences of others, just as I have through my upcycling ventures and narrative tinkering
Embracing the Essence of Arduino: 3 Timeless Takeaways
As I reflect on my journey with Arduino, I’ve come to realize that the true beauty of this platform lies not just in its technical capabilities, but in its ability to weave together the threads of past and present, allowing us to tell new stories with old materials.
The process of troubleshooting, much like the art of upcycling vintage clocks, is an exercise in patience and creativity – it’s about understanding the intricate dance between components and harnessing that knowledge to breathe new life into our projects.
Whether you’re a seasoned artisan or a curious novice, the world of Arduino offers a unique canvas for self-expression, inviting you to merge the elegance of traditional craftsmanship with the limitless possibilities of modern technology, and in doing so, to craft your own narrative of innovation and nostalgia.
Embracing the Spark of Creation
As we embark on the journey of mastering Arduino, remember that the true beauty of innovation lies not in the complexity of the circuit, but in the simplicity of the spark that sets our imagination ablaze.
Joseph Goto
Embracing the Journey of Arduino Discovery
As I reflect on our journey through the world of Arduino for beginners, it’s clear that the path to mastery is paved with curiosity and a willingness to experiment. We’ve unraveled the secrets of the Arduino board, learned to troubleshoot common issues, and discovered the joy of bringing our ideas to life. Whether you’re a seasoned tinkerer or just starting out, the key to success lies in embracing the process of learning and iteration. By doing so, you’ll not only gain a deeper understanding of Arduino but also develop a unique voice in the world of DIY electronics.
As you close this chapter and embark on your next project, remember that the true magic of Arduino lies not in the technology itself, but in the stories it helps you tell. The beauty of creation is a powerful force, capable of transforming not just materials, but the very way we see the world. So, let your imagination run wild, and let the soft glow of the Arduino board be the spark that ignites a lifelong passion for innovation and self-expression.
Frequently Asked Questions
What are the essential components of an Arduino board that a beginner should understand?
As I delve into the world of Arduino, I find that understanding the board’s core components is key. For a beginner, it’s essential to familiarize yourself with the microcontroller, USB connector, power pins, and input/output pins – these fundamental elements will help you unlock the board’s full potential and set you on the path to creating innovative projects.
How do I choose the right Arduino board for my first project?
Choosing the right Arduino board for my first project was a puzzle I loved solving. I considered the type of project I wanted to create, the number of sensors and actuators I’d need, and the level of complexity I was comfortable with. For beginners, I recommend starting with the Arduino Uno – its versatility and wide community support make it an ideal starting point.
What are some common mistakes beginners make when writing their first Arduino program and how can I avoid them?
As I reflect on my own Arduino journey, I recall stumbling over sloppy code and incorrect pin assignments. To avoid these pitfalls, I recommend carefully reviewing your code for typos and double-checking those pesky pin connections – it’s amazing how often a simple mistake can lead to hours of frustration.