I still remember the afternoon I stumbled upon an old 3D printer in my family’s hardware store – it was love at first sight, and I knew right then I’d use it to bring my grandmother’s stories to life, one print at a time. As I delved deeper into the world of DIY 3D Printing, I realized that many people believed it to be an exclusive domain of tech-savvy individuals, a notion that I found to be far from the truth. In reality, anyone can dive into DIY 3D printing, regardless of their background or skill level, and create something truly unique.
As someone who’s passionate about giving old objects new life, I’ve learned that DIY 3D printing is not just about creating something from scratch, but also about breathing new life into existing ideas. In this article, I’ll share my personal experiences and practical tips on how to get started with DIY 3D printing, from choosing the right materials to troubleshooting common issues. My goal is to inspire you to see the potential for creative storytelling in DIY 3D printing, and to provide you with the confidence to turn your ideas into tangible, functional pieces of art.
Table of Contents
Guide Overview: What You'll Need
Total Time: 5 hours 30 minutes
Estimated Cost: $500 – $1000
Difficulty Level: Hard
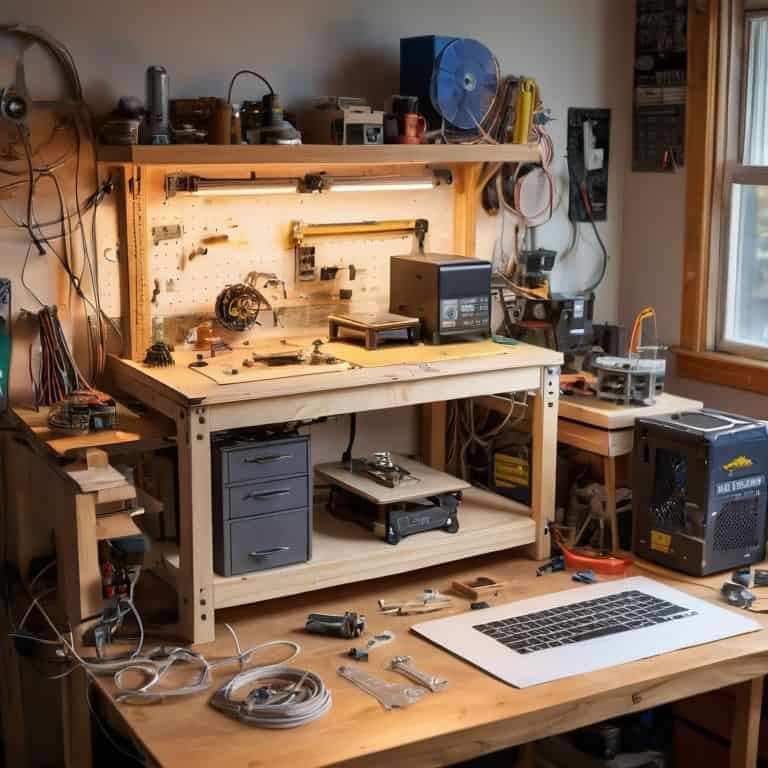
Tools Required
- Drill Press (for precise drilling)
- Jigsaw (for cutting metal and plastic)
- Soldering Iron (for electronics assembly)
- Calipers (for measuring precise distances)
- Level (for ensuring frame stability)
Supplies & Materials
- Aluminum Extrusions (for frame construction)
- 3D Printing Filament (for testing and calibration)
- Stepper Motors (for axis movement)
- Electronic Components (such as Arduino boards and motor drivers)
- Power Supply (capable of delivering 12 volts)
- Thermistor (for temperature sensing)
- Glass or Aluminum Build Plate (6 inches x 6 inches)
Step-by-Step Instructions
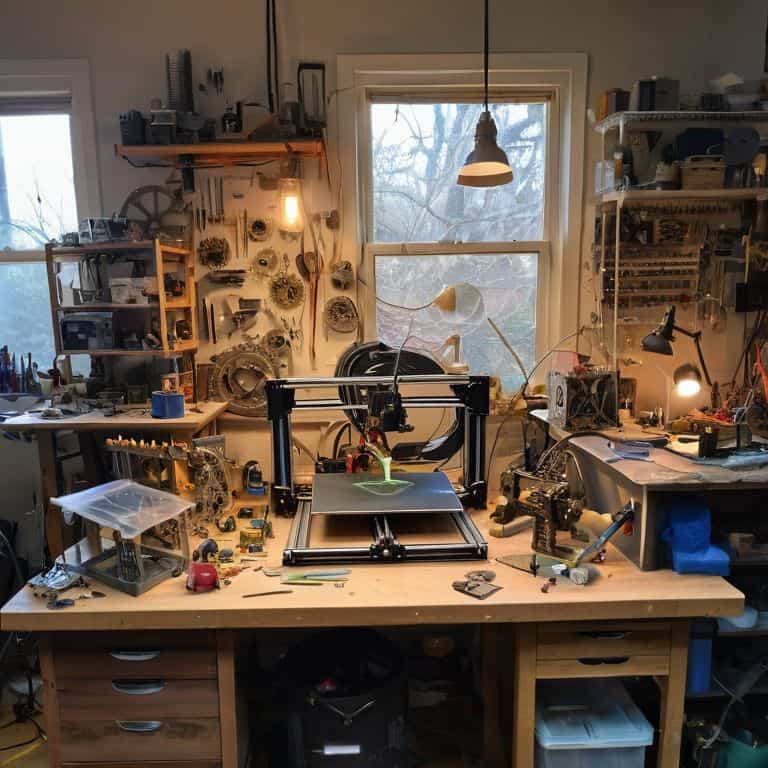
- 1. First, let’s start with the basics – gathering materials. I always begin by rummaging through my family’s old hardware store, searching for hidden gems that can be repurposed for my DIY 3D printing projects. This can include old machinery parts, scrap metal, or even vintage electronics. My grandmother used to say, “The best stories are told by the materials themselves,” and I find that to be especially true when it comes to breathing new life into discarded items.
- 2. Next, I move on to designing my project. This is where my trusty vintage fountain pen comes into play. I sketch out my ideas, letting the ink flow as I envision the transformation of my materials into something entirely new. For DIY 3D printing, it’s essential to have a clear design in mind, whether it’s a functional item like a custom phone case or a decorative piece that tells a story. I find inspiration in the intricate details of nature and the mechanical beauty of old clocks, which I often incorporate into my designs.
- 3. Now, it’s time to prepare my 3D printer. This involves calibrating the printer to ensure that it’s working accurately and efficiently. I’ve found that a well-calibrated printer is key to producing high-quality prints, especially when working with unique materials. My approach to calibration is a bit unorthodox – I like to think of it as tuning a musical instrument, where every adjustment is crucial to achieving the perfect harmony between the printer and the material.
- 4. With my design ready and my printer calibrated, I proceed to slice my model. This step is critical as it determines how the printer will interpret the design and layer the material. I use software that allows me to fine-tune the settings, ensuring that the print comes out exactly as I envisioned it. It’s a bit like conducting an orchestra, where every setting and adjustment plays a crucial role in the final performance.
- 5. The actual 3D printing process is where the magic happens. I load my prepared material into the printer and start the print job. Depending on the complexity of the design and the material used, this can take anywhere from a few hours to several days. I always find myself lost in the rhythm of the printer, watching as layer by layer, my design comes to life.
- 6. Once the printing is complete, it’s time for post-processing. This can involve sanding the print to smooth out any rough edges, painting it to add color and character, or even assembling multiple parts into a single, cohesive piece. My approach to post-processing is very much like restoring an old clock – every detail matters, and the end result should be a testament to the beauty of transformation.
- 7. Finally, I assemble and refine my project. If I’m creating something like a custom clock, this is where I add the final touches, such as hand-painting details or adding mechanical components. It’s a moment of pure joy, seeing my design go from a sketch on a piece of paper to a fully functional, one-of-a-kind piece of art that tells a story of its own. And as I look at my finished project, I’m reminded of my grandmother’s words – the true beauty lies not in the end result, but in the journey itself.
Reviving Relics Through Diy 3d Printing
As I delve into the world of budget friendly 3d printer kits, I’m reminded of the countless hours I spent in my family’s hardware store, surrounded by relics waiting to be revived. My grandmother’s stories of transformation and nostalgia have always been a source of inspiration for me, and I’ve found that 3d printing for beginners tutorial resources can be a great starting point for those looking to bring their own ideas to life. By combining traditional craftsmanship with modern technology, I’ve been able to create unique pieces that tell a story of their own.
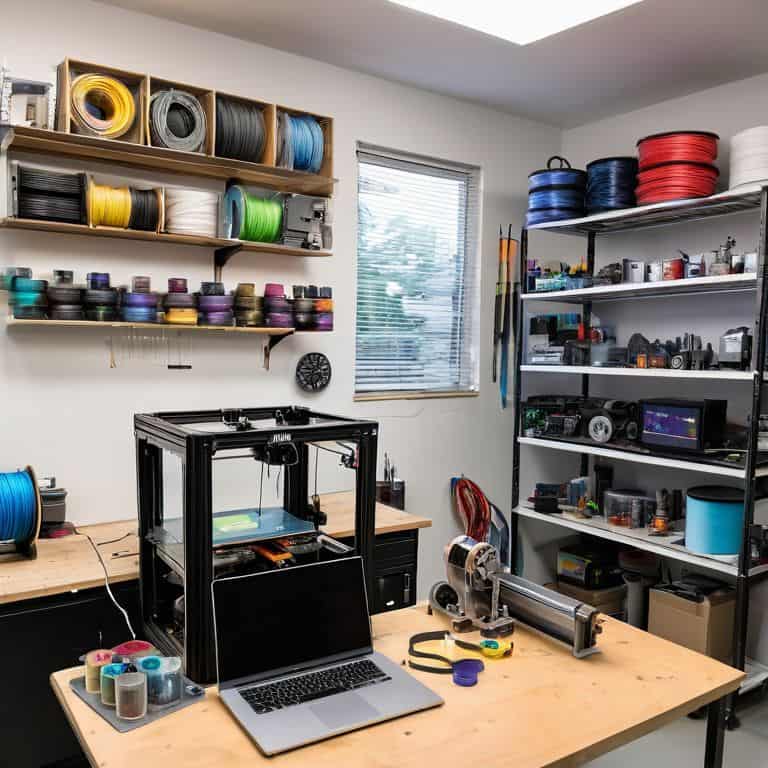
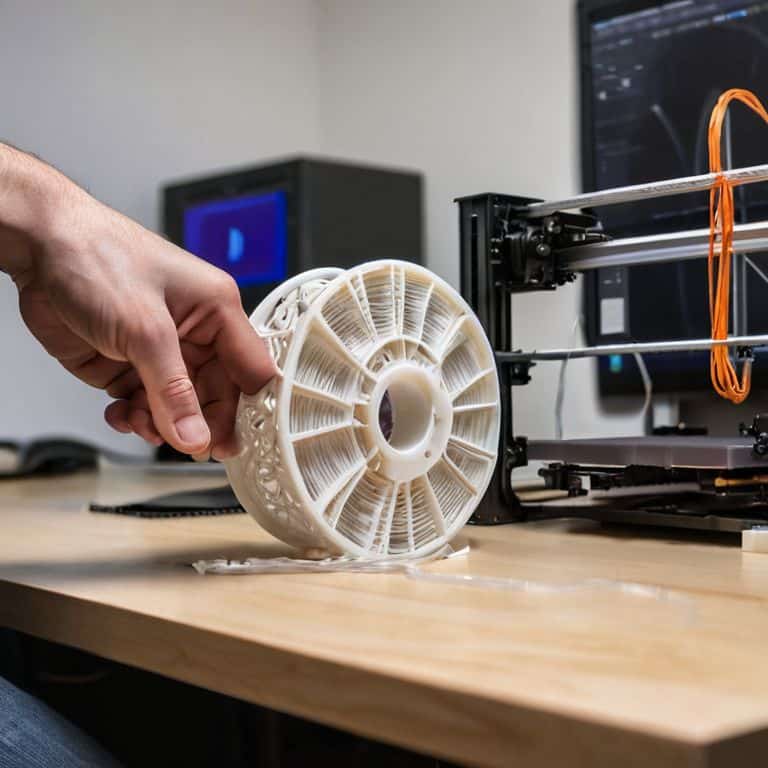
When it comes to selecting the right materials, I’ve found that best filaments for DIY projects can make all the difference in the final product. From the texture to the color, each filament has its own character, and choosing the right one can elevate the entire piece. I’ve also discovered that 3d model design software for beginners can be a powerful tool in bringing my ideas to life. By experimenting with different designs and models, I’ve been able to push the boundaries of what’s possible with DIY 3D printing.
As with any craft, troubleshooting common 3d printing issues is an inevitable part of the process. However, with patience and practice, I’ve found that even the most daunting problems can be overcome. One solution I’ve implemented in my own workshop is a DIY 3d printer enclosure, which has helped to improve the overall printing experience. By sharing my own experiences and tips, I hope to inspire others to explore the world of DIY 3D printing and uncover the stories hidden within the relics of the past.
Breathing Life With Best Filaments for Diy Projects
As I delve into the world of DIY 3D printing, I’m constantly amazed by the plethora of filaments available. Each one is like a painter’s color, waiting to bring a unique texture and story to my creations. I’ve experimented with PLA, ABS, and even wood-infused filaments, but my favorite remains the metallic-infused ones – they add a touch of nostalgia and industrial chic to my upcycled clock projects. The way the light reflects off the printed metal finish is nothing short of magical, transporting me back to afternoons spent in my family’s hardware store, surrounded by the gentle ticking of clocks and the smell of old wood.
With the right filament, even the most mundane objects can be transformed into something extraordinary. I recall a project where I used a glow-in-the-dark filament to create a series of clock hands, giving an old relic a futuristic twist. The result was breathtaking – as the lights dimmed, the clock came alive, its glowing hands weaving a tale of innovation and tradition intertwined. It’s moments like these that remind me why I’m so passionate about DIY 3D printing: the ability to breathe life into forgotten relics, one carefully chosen filament at a time.
Unlocking Budget Friendly 3d Printer Kits
As I delve into the world of DIY 3D printing, I’ve discovered that one of the most significant barriers to entry is the cost. However, I’ve found that budget-friendly 3D printer kits can be a game-changer. These kits, often requiring assembly, not only reduce the financial burden but also offer a unique hands-on experience. I recall spending hours with my grandmother, assembling and repairing old clocks, and similarly, these kits bring back a sense of nostalgia and excitement.
I’ve had the pleasure of working with a few of these kits, and I must say, the process of unlocking their potential is deeply satisfying. From calibrating the printer to watching my first prototype come to life, it’s a journey that echoes the stories my grandmother used to tell me about fixing broken machinery in our hardware store. With these kits, the possibilities are endless, and the sense of accomplishment is unparalleled.
Tinkering Gems: 5 DIY 3D Printing Tips from My Workshop
- I always start by sketching my ideas with a vintage fountain pen, believing it connects me more deeply to the craftsmanship of the past, and helps me envision how to turn forgotten relics into futuristic creations
- Experimenting with different filaments can be a game-changer – I once used a metallic filament to create a custom gear for an old clock, and it ended up being the perfect blend of past and present
- Don’t be afraid to upcycle and reuse materials – I’ve turned old machine parts into 3D printing accessories, and it’s amazing how a little creativity can reduce waste and save you money
- Calibrating your 3D printer is an art form – take your time, and don’t be discouraged by trial and error, as the process of refining your settings can often lead to unexpected innovations and insights
- When bringing old objects into the world of 3D printing, consider the story they tell – I once printed a custom mount for my grandmother’s antique locket, and it became a beautiful piece of narrative jewelry that tells a story of love and legacy
Key Takeaways from My Workshop
I’ve learned that with a bit of patience and the right tools, even the most forgotten relics can be transformed into something not only functional but also uniquely beautiful, telling stories of their own through the art of DIY 3D printing
Choosing the right filament is crucial – it’s not just about durability, but also about the aesthetic you’re aiming for; I’ve found that experimenting with different filaments can lead to some truly surprising and inspiring results
Perhaps the most important lesson I’ve taken away from my DIY 3D printing journey is the value of community – sharing knowledge, resources, and stories with fellow makers has not only improved my craft but has also reminded me of the power of collaboration and mutual inspiration in bringing new ideas to life
Embracing the Art of Transformation
As I bring old relics to life with the hum of a 3D printer, I’m reminded that DIY 3D printing isn’t just about crafting objects, but about weaving tales of the past into the fabric of our present, where every layer of filament is a brushstroke of imagination.
Joseph Goto
Embracing the Future of DIY 3D Printing
As I reflect on our journey through the world of DIY 3D printing, I’m reminded of the transformative power of giving old relics new life. From unlocking budget-friendly 3D printer kits to breathing life into projects with the best filaments, we’ve explored the many facets of this innovative craft. It’s clear that DIY 3D printing is not just about creating something from scratch, but also about reviving relics and telling stories through the objects we bring into being. Whether you’re a seasoned maker or just starting out, the key to success lies in embracing the process, experimenting with different materials, and pushing the boundaries of what’s possible.
As we conclude this exploration of DIY 3D printing, I want to leave you with a final thought: the true magic of this craft lies not in the technology itself, but in the stories we tell through the objects we create. So, let’s continue to dream big, to tinker, and to push the limits of our imagination. For in the world of DIY 3D printing, the past, present, and future converge, offering us a unique opportunity to reimagine the ordinary and craft a more wondrous, more meaningful world, one print at a time.
Frequently Asked Questions
What are the essential safety precautions I should take when working with DIY 3D printing equipment?
As I tinker with my vintage clocks and 3D prints, I always remind myself to wear protective goggles, keep loose clothing tied back, and ensure good ventilation – my grandmother’s wisdom echoes: safety is the best craftsmanship.
How can I ensure the quality and durability of my 3D printed creations?
To ensure quality and durability, I always consider the type of filament and printing settings. For instance, using PLA or ABS with the right temperature and layer thickness can make a huge difference. I also make sure to post-process my prints, sanding and coating them when necessary, just like my grandmother taught me to finish her wooden sculptures.
What are some creative ways to upcycle or repurpose failed 3D prints into new and interesting projects?
I love giving failed prints a second chance. Try turning them into unique planters, decorative coasters, or even incorporating them into a mosaic artwork. You can also use them as bases for handmade candles or as embellishments for vintage clock faces, like I do in my upcycling projects. The possibilities are endless, and it’s a great way to reduce waste while sparking new creativity.